Showing posts with label papertrey. Show all posts

Wednesday, 20 November 2013

Fall Leaves Wedding Card


Here is the wedding card I made for one of my best friends who recently got married. She wanted a vintage Autumn theme wedding, complete with Fall Leaf cake and all the vintage extras. I decided to make a card which tied in with both these things. I think the little love birds in the tree work well for a wedding card, but this card could easily be adapted to have 1 or no birds in the tree, and with an alternative sentiment.


I even used some of my precious Nana's buttons from her button tin, but they definitely set the card off.

Stamps: Waltzingmouse Teeny trees, Papertrey Ink Leaf prints
Ink: Tim Holtz Distress inks- Tea Dye, Antique linen, Spiced marmalade, Barn Door, Walnut stain
Twine: Fantastic Ribbons Gold and Ivory Bakers twine
Card base: Kraft 6" square

Please let me know what you feel about my alternative style wedding card!

Thursday, 14 February 2013

Fantastic Ribbons Design Team Bows

So this month the challenge for the design team was to do something fantastic with bows! Easy, right?!!
Well I think its fair to say everyone can tie a simple bow (although getting it to sit right on a card isn't always easy), but I decided to do something a little different.

This is a tiered bow.

The great thing about this type of bow is that you can use up all your scrap pieces of ribbon.

I used 3 different types of ribbon, varying lengths and widths, and used some white cotton thread to tie them together, as I was putting an embellishment over them. You could just as easily use another piece of ribbon to tie them together to get a nice neat finish. Think I'll try that on another card!

 Here it is on the card, and I put a length of the main ribbon along the card too.


The card is for our next door neighbours who have just had their first little one, and I cut the name on my Silhouette Portrait. The concentric circle stamps are Waltzingmouse Teeny Trees, and the Special delivery date stamps are from Post Marks PTI, and the Welcome little one is from a Hero Arts Baby set. Ribbon is from, of course, Fantastic Ribbons
Blue organza Polka dot
Teal gingham
White satin

Friday, 14 December 2012

60,000 views and my Christmas Cards

This week was quite momentous, as I reached 60,000 views on my blog! I am astonished that in the past 2 years I have had anything like that number of visitors, but I know its primarily down to two posts! One with a cupcake wrapper template, and one with a Union Jack template I created about the time of the Royal Wedding, which was also really popular this summer for the Olympics and Queens Jubilee. I'm hoping to add some extra templates to the cupcake wrapper page soon with printable wrappers I have designed, so hopefully it will continue to be popular.


This week I have mostly been getting sorted for Christmas, baking Christmas cakes, making cards, planning church events. I have to say that I only ever make handmade Christmas cards for immediate family and very close friends. This year I have made 11. I buy a box of cards for all my other cards and try to personalise them a bit with a verse of scripture, but that's my limit for the other 50 or so cards!

I have been so excited to use the wonderful Papertrey Ink set, Star of Wonder, which I got for Christmas last year and I have not been disappointed. The set has 3 main circular images, and I chose the manger scene for this years cards (I can save the other two for future years!). I wanted a verse of Scripture, and recently bought some Nina B Layers of Colour Christmas verses. I chose a suitable verse and stamped directly onto the kraft card base.


I stamped my circular image onto white cardstock using, then used distress inks (antique linen, tea dye and walnut stain) to add some colour to the image. I cut it using my spellbinders circles and layered onto a sun style die cut from Nellies dies - Multi frame Die Star #2, cut from bronze cardstock. I then layered this on to a labels 1 or labels 4 die cut, both stamped with a music background and heat embossed with gold embossing powder. Some gorgeous brown ribbon from Fantastic Ribbons finished it off really well.


I'm entering these cards into the Addicted to Stamping Bingo
This qualifies for the middle row, Ribbon, FREE (Sponging) and Embossing.

Its also being entered into Young Crafters Unite Challenge #16 - Happy Holidays


Thursday, 18 October 2012

More banner cards

Here are two more banner cards, this time with an orange theme. The left paper is Basic Grey, the middle and right papers are Dovecraft Funky Vintage.
I used a labels 1 nestie for the sentiment and frame and some orange satin ribbon. I also sponged the edges in  Tea Dye distress ink. The Thank You sentiment is a Papertrey Fillable frames 5 one.

As I had two lots of strips I made another, this time with a circle focal point, I haven't put a sentiment on this yet, but will stamp straight onto the card at the bottom.


The die here is half of a Nellie Snellen Multiframe 25 die. I also punched a 1.5inch circle and stamped it with concentric circles from Waltzingmouse teeny trees in Cracked sapphire distress ink and the sponged with Tea Dye.


Monday, 1 October 2012

Baby Boy Card

Here is a baby card for some friends for the birth of their little boy Jake.
I started off by cutting and embossing a Labels 1 spellbinders nestability with the Cuttlebug New Baby embossing folder. I did this onto some baby blue card and then sponged with Broken China Distress ink. Next I cut and embossed a Labels 4 nestability in white card and using a grid mask, and again sponged with Broken China ink.  I used some chipboard letters to spell out his name.

The card blank was stamped directly with a plaid/check from the Waltzingmouse Offbeat Backgrounds stamp set (Whispers Starry Starry Night ink). I used some teal blue felt for some of the embellishments, cutting them was really easy with my cuttlebug, much easier than I anticipated, although I wouldn't try an intricate pattern. The first was a scalloped piece (Spellbinders Scalloped edgeabilities) and then I did a small cuttlebug star. To personalise the card a little more I added the little circle sentiment and the date of birth using my Papertrey Ink Postmarks set.


Saturday, 8 September 2012

Vintage postage bottle label

Here is a vintage tag I made for a friend. I love the look of kraft, and using versamark on it is a great way of stamping. Most of the images you can see are from the Papertrey Ink Postmarks set. I have the matching stamp die which I used to cut out the little bee stamp. The polka dot background is from Waltzingmouse Offbeat Backgrounds. The main stamp on this is the Fragile, as it will be attached to a bottle of wine!!

Sunday, 15 July 2012

Casual Fridays 61 - CASE card

CFC61


I was over on my friend Kirsty's blog and saw this lovely card, immediately I knew I wanted to CASE it, and so armed with some scraps which I've been meaning to use for ages, and my trusty cuttlebug to cut me some lovely shapes I set about making my own version. This is also for the CAS-ual fridays challenge to use strips of paper.


The two outer banners are Basic Grey papers, whilst the chevron one is actually a scrap of wallpaper. I used my Papertrey Fillable Frames 5 for the main sentiment frame. I have the matching die, and so the blue one is the full size of the die, and stamped around the edge with a gentle blue tone, and then I used the die twice to get the smaller version of the frame by overlapping and cutting off part of the larger one. I then used my Waltzingmouse teeny trees sentiment, added some lovely sage ribbon and a couple of pins (very Kirsty!) and Broken China distress ink finish off this card.


I had enough scraps to make two cards, but didn't want them to be identical,  so this time I used my Spellbinders nesties Labels 1 for the sentiment and frame, cut in half. 


The sentiment here is from Banana Frog.


Tuesday, 22 May 2012

OLW88 - Mini Masterpiece

So this weeks One Layer Wednesday challenge was to create a mini masterpiece, limited to a 2 inch square, but with a sentiment allowed outside this limit. I'll be honest, I was inspired by Susan over at Simplicity to give this a go, and I'm so pleased I did, because I really enjoyed playing around a little with this challenge. Here I'm sharing 2 cards which use the same stamps, but highlight how small changes can completely change the look of the card.
Up first is the portrait version in mainly blue. I die cut the stamp shape in a piece of card using my cuttlebug stamp die. I then used it as a mask to sponge and stamp inside. I used Cracked Sapphire, Broken china and Tea Dye distress inks to sponge my background. I then used a music note stamp in broken china at a diagonal. I have a beautiful Papertrey stamp set called Postmarks, and it has these tiny little images that mostly I never use, but thought they would be perfect for such a small area. I also used a sentiment from this set.

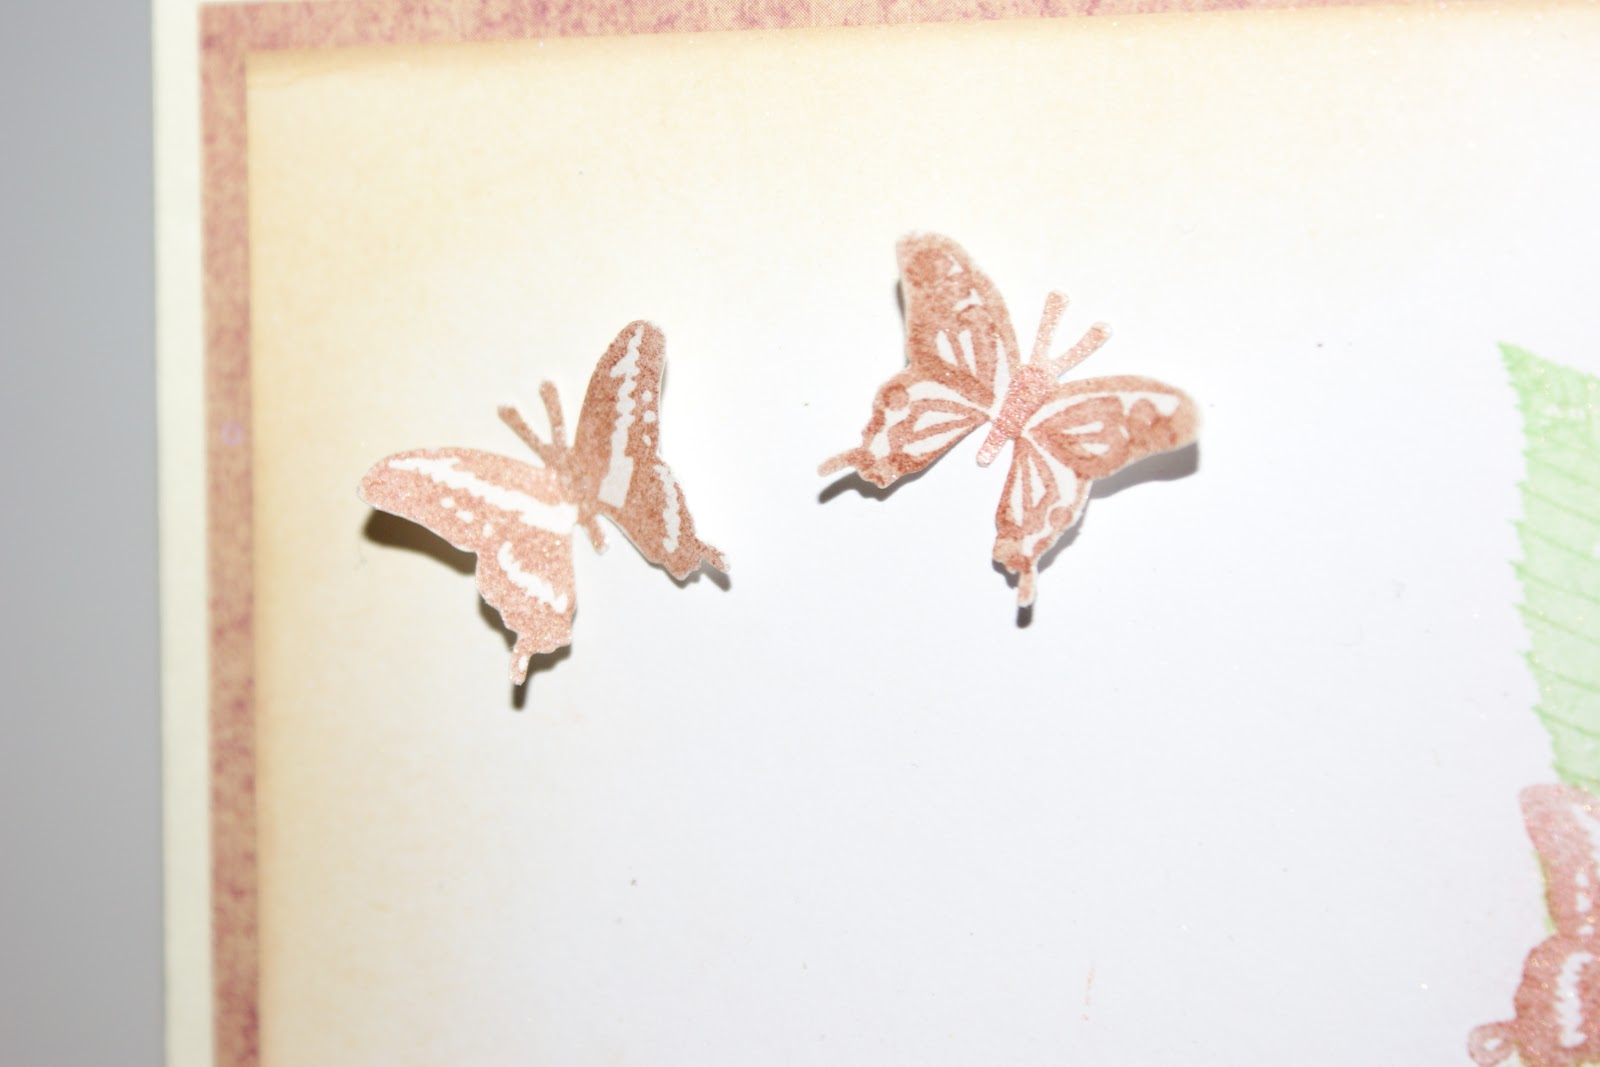
Here is a close up of the 2 inch image. 
Here's the landscape version of the same card, with the sentiment going into the little frame.

I tried stamping the music notes in versamark this time, but it didn't show up very well at all. Inks this time were Tea Dye and Walnut stain.

I hope you're inspired by this mini masterpiece, I will definitely be using this technique again very soon. I might venture a little bit bigger than 2 inches, and choose a Spellbinders label for the shape!


Wednesday, 9 May 2012

Sunshine and Cloud Passion for Papertrey challenge.

Over at A Passion for Papertrey this fortnights challenge is to create a 'Whatever the weather' project. I only have a few PTI sets, and none of them jumped out at me as weather stamps...but then I was inspired by the fillable frames 5 which I have, and looked quite cloud-like, and also had the sentiment 'hello sunshine'!
This is a very simple card, I stamped a circle image and cut out with my circle nesties, I also stamped some chevrons from the PTI Postmarks set to be the suns rays and cut them out. I stamped fillable frames 5 in some sky blue ink and then used the die to cut it out. Finally I stamped the sentiment and used a fine line pen to outline the card. Hopefully this card will cheer someones day!


Monday, 7 May 2012

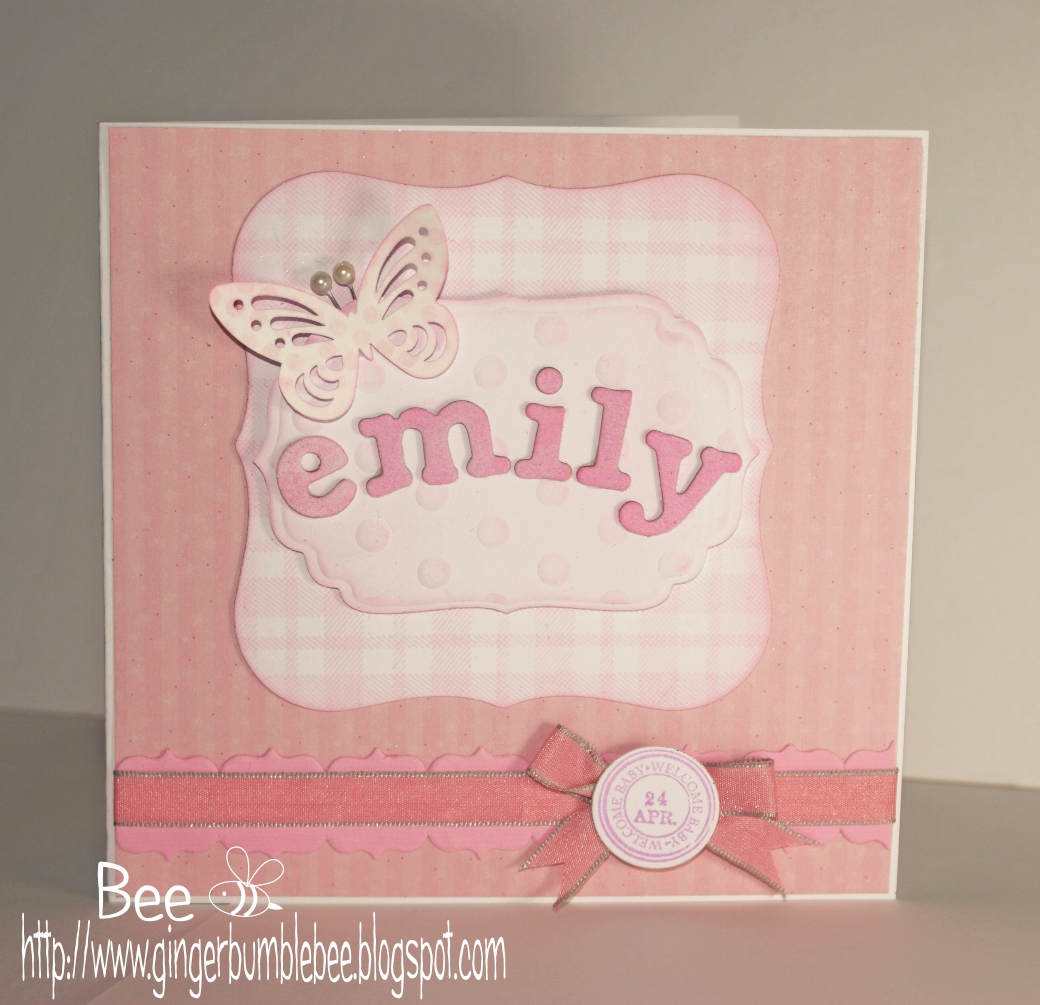
Welcome Emily

So last week my little Niece Emily was born, she is my 2nd niece and she is just gorgeous!
Here's the card I made for her.
Stamps: Plaid background stamp on the labels 1 shape is Waltzingmouse Offbeat backgrounds
The butterfly is stamped with polka dots from Waltzingmouse Offbeat backgrounds too. 
The Welcome baby and date stamps are from Papertrey Ink Postmarks set.
Ink: Main images are inked with Memento Dew Drop Angel Pink
Small date circle was too pale in angel pink so I used Colourbox Lilac ink.
Die cuts/Punches: Butterfly is Tonic Studios
Stacked nesties are Spellbinders Label 1 and label 4 - label 4 is embossed with polka dots.
Under the ribbon is a strip from some Bazzill basics die cut strips. 
Little circle is the spellbinders nestie smallest circle size.
The chipboard letters I've had for ages.
Cardstock: Background striped paper is from papermania, don't know which pack, sorry!
Ribbon: VV Rouloux


I also stitched her a personalised blanket. The rabbit is just cut from white fleece material and I embroidered the main features. I then cut out the letters from white fleece (using some chipboard letters as a template!) and then when I'd stitched them on in white I added some outline stitching to make it stand out a little. The blanket itself was from Sainsbury's (a supermarket) and has cute little hearts almost embossed on it.

Saturday, 28 April 2012

Less is more/Passion for Papertrey Wonderful Wildlife Challenge Part 2


I wanted to add another card to the Passion for Papertrey challenge that I made recently using my wonderful Papertrey Leaf print dies, and it also qualifies for the Less is More sketch challenge.

Its quite similar to my last card, in that it uses the negative die cut to showcase the die (there's no way I could have cut through the very textured bamboo with a die, so using the negative means I could still use it). The first card is using a burgundy background paper and then a lovely rusty bamboo paper, tea dye distress inks to sponge around the edges and a simple banner sentiment.

Next I did another card using the same idea, but using green tones.
Forest moss distress ink this time and I moved my banner over to the side to give it a slightly different look.

The sentiment is a very old wooden stamp I've had for years which has a little bunch of flowers at one end which I always mask off, but unbelievably its the only 'thinking of you' sentiment I have, but I love that phrase, its so versatile.
Hope you like this natural/wildlife card!

Wednesday, 18 April 2012

Passion for Papertrey - Wonderful Wildlife challenge

I've been waiting for a challenge over on the Passion for Papertrey blog that I can make the most of since my Papertrey stuff arrived at Christmas, and finally, a challenge made for me!!!
I love all things natural and tree like so this challenge is right up my street, and I imagine I shall be taking part more than once!

The first offering I have is a card which uses the Leaf Print dies and uses their negatives. It took a little time (and more than one attempt!) to get the leaves to fit onto the DL size card I was using! Once I was happy with the layout I layered it over some bamboo type background paper in a lovely rusty/autumn colour. I sponged with tea dye distress ink and added a brown ribbon and small labels 4 Nestie onto which I'd stamped a waltzingmouse sentiment.
I hope you like my natural card and are inspired to use the negative dies!

Saturday, 14 April 2012

Papertrey Leaf print cards

Today I'm sharing a card which I have made this week using my Papertrey leaf die which can be used for various different occasions. Unfortunately I needed a sympathy card for a friend, and its not something I usually have to hand (although I have made a spare one to keep for the future).

For sympathy cards I like to keep the colours muted and tonal, so I choose to use Antique Linen distress ink and then some background paper which matched in well.
I cut out a leaf from some white card using my papertrey leaf dies and then embossed with CB script folder to give it some texture. After a quick sponge with the distress ink and some basic matt and layers I stamped the sentiment underneath in more antique linen ink.
This card is actually really versatile, and I made it again but just changed the sentiment.

I think this card would work in various different colour ways too to give it a more upbeat look. I think I'll definitely make it in green and some autumn colours!

Wednesday, 14 March 2012

Waltzingmouse Sketch Challenge 88 - Baby Card

WMS Sketches_MS font_separate 
Here is my take on this weeks Waltzingmouse Sketch Challenge.
I was so pleased to hear that some of our University friends had their little twins this week, and so this was the perfect opportunity to make a card. I printed off their names on the computer and made into tiny banners. I stamped Waltzingmouse polka dots (Offbeat Backgrounds) in Memento Angel pink onto some white card. I then cut some circles from white card using my nesties, and at the same time embossed them with some circles. The background of the circles is a Mariannes Die. I didn't have any pink card to use for my layers and die cuts so I improvised and coloured some white card with my promarkers which worked really well. The butterflies are stamped and punches with a Martha Stewart punch.
The small 'Special Delivery' stamp with the date of birth is from Papertrey Ink, and I made a little flower for it to sit on. Some double ribbon finished it off.
I hope you like my take on the sketch!

Tuesday, 28 February 2012

50th Birthday - WMSC #86

WMS Sketches_MS font_separate
Here is my take on this weeks waltzingmouse sketch challenge.

To make the roses I used some goldy thick paper which was only coloured on one side, so when I'd started the basic rose making (which you can read about here) I folded the spiral piece in half so that it would look coloured on both sides.
The main element is made from Spellbinders Labels 4 die cuts, the white one embossed with cuttlebug divine swirls and then sponged with antique linen distress ink. The leaves are cut with my Papertrey Leaf print dies. The centre of the flowers looked a little empty, so I put some tiny gems in. The background burgundy paper is  wallpaper from a discontinued pattern book.

My sentiment is made mostly from little parts of Teeny Trees!
The leaf stamp finishes it off at each end, and the sentiment is patched together from
'happy thanksgiving'
Letraset rub on numbers
'thank you'
'Birthday Wishes'

This is one way to make your stamps even better value! I'm always looking for ways to use them differently!

Friday, 17 February 2012

Waltzingmouse blog party - Spring

Blog-Party-Logo 70%25


Welcome to this months waltz, and the theme is Spring.

 I couldn't resist some butterflies and leaves, both of which were Christmas presents. The leaf prints stamps are from Papertrey, and the butterfly stamps are from a Martha Stewart stamp and punch set. I started off by punching some butterflies from post it notes to act as a mask, then I added the leaves, laying and masking as I went along. I added the butterflies using versamark and mica powders to give it a little shine and then did some separate butterflies on some white card to punch and use for a bit of dimension.
 I sponged all around the edge with some tea dye distress ink and then made myself a little banner with the beautiful Waltzingmouse font, the stamps are from the teeny trees set.

There isn't actually a sentiment that says happy birthday, but I masked off both the 'happy thanksgiving' and 'Birthday wishes' stamps to get the sentiment I wanted. I sponged the banner and curled it around my scissors for some more dimension. Finally I layered everything onto some burnt orange cardstock and then onto a 6" cream square card base.
I hope you like it, and enjoy my Spring inspired card!
This card is also being entered into the Prickley Pear Rubber stamp sketch challenge.