Showing posts with label punches. Show all posts

Thursday, 28 November 2013

Baby Boys cards and Gifts 2

We seem to know lots of people having Baby boys recently, and not being one to make identical cards I made variations on a theme for each of them. The main theme was a Silhouette cut name (my preferred font is Segeo Script as it welds really well for cutting), ribbon strip, sentiment and stamped background in matching colours. 
The first card is a stamped gingham background and little punched footprints. I even added tiny star button embellishments to the name for extra depth.

Stamps: Waltzingmouse Offbeat background, Hero Arts Baby sentiment
Ink: Broken China Distress ink
Embossing folder: Swiss dots
Ribbon: Fantastic Ribbons Organza Aqua dots
Card base: White A5

The second card follows many similar ideas. I stamped a background using the concentric circles from the Waltzingmouse Teeny Trees. I did it by eye as I was in a rush, but it is better if you measure out the circle centres properly. If you have a gridded acrylic block its definitely possible to do this by eye like I did.

Stamps: Waltzingmouse Teeny Trees, Hero Arts Baby sentiment
Ink: Broken China Distress ink
Embossing folder: Swiss dots
Ribbon: Fantastic Ribbons Organza Aqua dots
Card base: White A5
This third card I didn't use a stamped background, but used a That Special Touch of Mica mask and sponged it.

Stamps:  Hero Arts Baby sentiment
Ink: Broken China Distress ink
Embossing folder: Swiss dots
Ribbon: Fantastic Ribbons Organza Aqua dots
Card base: White 5" square


This final piece is a gift I gave to some friends whose little boy was being dedicated. I made each of the cut files and combined to create this image which I framed.

Sunday, 16 June 2013

Gorjus Girlie card

This is a card I made for my friends daughter who was turning 3. I used a Gorjus Girl stamp and coloured her with promarkers. I've learned my lesson in the past and having coloured a beautiful image not been able to find any paper to match it, so based on some advice from C&C I chose my background paper first and based my promarkers on that! It makes SO much sense! I made use of some little punches which often get neglected, a tiny label one onto which I stamped her name, and a candle one which I think looks cute in the centre of a die cut circle. Doing pinks and purples is outside of my comfort zone, but I'm happy with how it turned out!

Wednesday, 1 May 2013

Vintage 30th Butterfly Card

Here is a card I made for one of my housemates from uni. She is the most lovely person you could care to meet, and I thought this delicate and beautiful card was so suited for her.
I cut the numbers on my silhouette, and the background paper and the purple 30 are some papers I got free with Cardmaking and Papercraft magazine (Issue 115) a few weeks ago called Floral Fantasy.

The sentiment is a very old wooden stamp which was stamped onto a labels 4 shape I cut from cream card with my cuttlebug and inked with Walnut Stain distress ink. I also inked the edges of everything with this too!!! The butterfly is a punch I borrowed from a friend, and I think its a Tonic Studios punch and I inked it up with some new distress ink Seedless preserve.

The ribbon is ivory senorita ribbon, and finishes it off :)


Thursday, 18 October 2012

More banner cards

Here are two more banner cards, this time with an orange theme. The left paper is Basic Grey, the middle and right papers are Dovecraft Funky Vintage.
I used a labels 1 nestie for the sentiment and frame and some orange satin ribbon. I also sponged the edges in  Tea Dye distress ink. The Thank You sentiment is a Papertrey Fillable frames 5 one.

As I had two lots of strips I made another, this time with a circle focal point, I haven't put a sentiment on this yet, but will stamp straight onto the card at the bottom.


The die here is half of a Nellie Snellen Multiframe 25 die. I also punched a 1.5inch circle and stamped it with concentric circles from Waltzingmouse teeny trees in Cracked sapphire distress ink and the sponged with Tea Dye.


Thursday, 20 September 2012

Baby girl card

Here is a card I made for friends when their little girl was born. Its alot more fussy that my usual style, but I think it works for this card. I started by cutting and embossing a large Labels 1 Spellbinders nestability and its embossed with Divine swirls embossing folder. I then did the same for a medium sized Labels 4 nestability and a polka dot mask. The labels 1 was then sponged with Colourbox Pink ink, and the Labels 4 was sponged with Memento Angel Pink. I added some Stampendous spots down the sides of the cards, used a flourish in the background in a subtle pink (My Minds Eye -Wild Asparagus) and also stamped a Tonic Buttefly punch with some script from the same set. I spelled out the name of the baby using chipboard letters  and then added the fantastic pink polka dot ribbon.


Monday, 17 September 2012

Waltzingmouse September Blog Party - Fall

Blog-Party-Logo 70%25


So this months blog party is based on the theme of fall, something I absolutely love. The colours at this time of year are just beautiful, and seeing the silhouette of the trees as the sun sets is something I always look forward too, so I chose to do a silhouette card.

The stamps I have used are Waltzingmouse teeny trees, my absolute favourite set. I stamped the tree and leaves in archival black ink as I was going to be sponging the distress inks and I didn't want any smudging. (I used Antique linen, Tea dye and Barn door distress inks). I have a little maple leaf punch which I used along the bottom of the background paper (some scrap wallpaper) and then added 3 strips of gold ribbon and the sentiment.

Here's a close up of the tree with its fallen leaves.

If you'd like to continue on the party head over to Waltzingmouse now.

Tuesday, 17 July 2012

Waltzingmouse Blog party - The Great Outdoors

Blog-Party-Logo 70%25
Welcome to this months Waltzingmouse blog party where the theme is The Great Outdoors, I immediately thought of my teeny trees set, but didn't just want to do some trees. When I hear the phrase "great outdoors" it always makes me think of camping, and what says camping better than a camp fire!!


Some clever use of teeny trees was needed to make the camp fire, and some obligatory marshmallows!

I've shown some of the stamps I used to create the camp fire.


I also stamped the stars, moon and marshmallows in versamark and heat embossed in white. (the moon was the circular stamp which was masked with a 1.5inch circle I had cut out).
I then sponged the top of the picture in cracked sapphire distress ink and the bottom is both walnut stain and forest moss. 
I finished off the card with a hand written sentiment on a mini banner,


To see what other people came up with for this theme pop over to the waltzingmouse website!

Friday, 8 June 2012

Waltzingmouse sketch challenge #100!


You probably know that some of my favourite challenges happen over at Waltzingmouse, and this week they're celebrating their 100th sketch challenge, so I really wanted to take part.WMSC100

 Its my friends birthday, and she's a literature lover, so I decided I wanted to incorporate some text into the card. I'd also seen a fab technique over at Simplicity using a polka dot stamp. Instead of just stamping in one colour you offset the stamp and use a different coloured ink. The waltzingmouse polka dot which is from Offbeat Backgrounds is quite a close pattern, so I wasn't sure if it would work, but it did! I stamped with some Whispers ink in Mossy Stone and Chestnut, you can see how it works below.


I also used the sentiments from Teeny trees (by masking off happy thanksgiving and Birthday wishes).
The butterfly is a Tonic Studios punch, the frame is a Labels 1 nestie frame embossed with a cuttlebug folder and the sponged. I layered one of the polka dot strips onto a brown ribbon to make it pop a little. I also stamped some very faint floral images in the background and sponged the edges. The butterfly was distressed, then I added some mica powder and some bling for its antennae!
To see all the other takes on the sketch head over to Waltzingmouse!

Monday, 7 May 2012

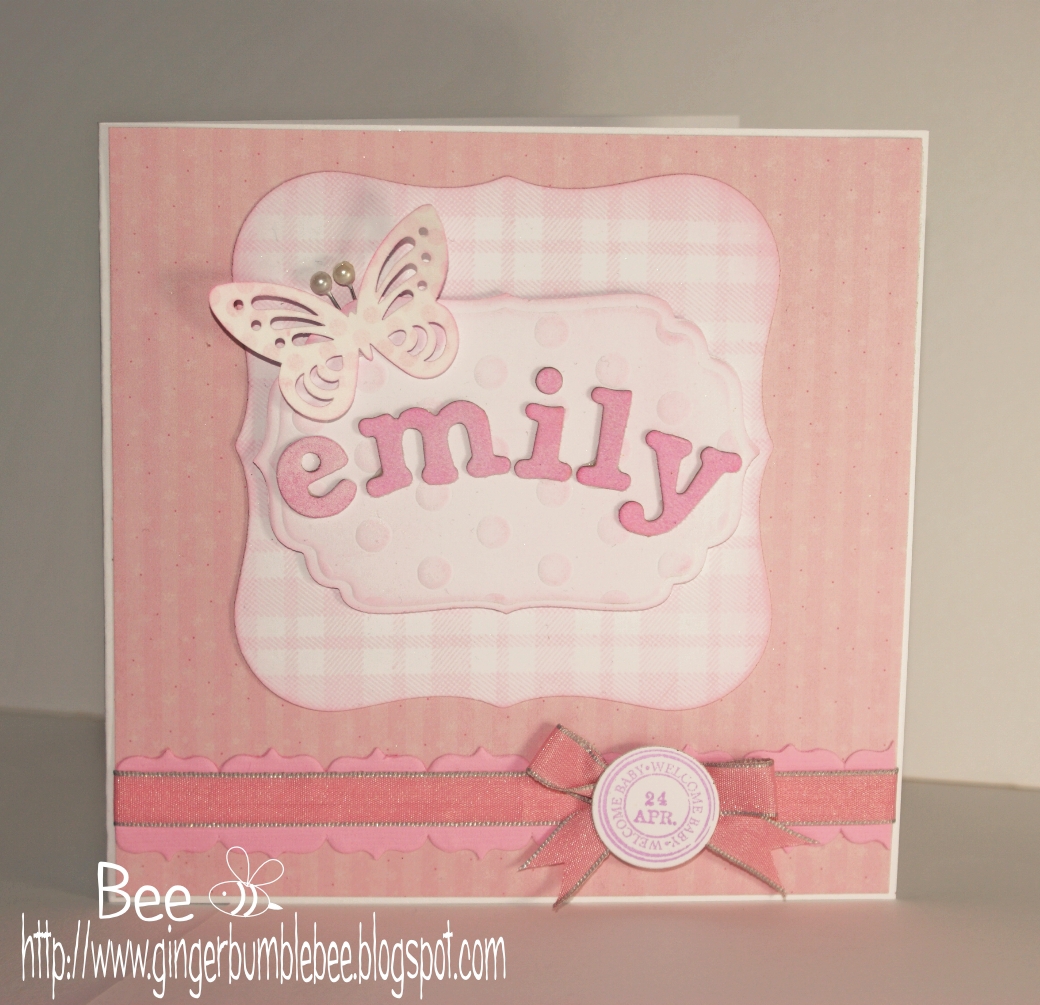
Welcome Emily

So last week my little Niece Emily was born, she is my 2nd niece and she is just gorgeous!
Here's the card I made for her.
Stamps: Plaid background stamp on the labels 1 shape is Waltzingmouse Offbeat backgrounds
The butterfly is stamped with polka dots from Waltzingmouse Offbeat backgrounds too. 
The Welcome baby and date stamps are from Papertrey Ink Postmarks set.
Ink: Main images are inked with Memento Dew Drop Angel Pink
Small date circle was too pale in angel pink so I used Colourbox Lilac ink.
Die cuts/Punches: Butterfly is Tonic Studios
Stacked nesties are Spellbinders Label 1 and label 4 - label 4 is embossed with polka dots.
Under the ribbon is a strip from some Bazzill basics die cut strips. 
Little circle is the spellbinders nestie smallest circle size.
The chipboard letters I've had for ages.
Cardstock: Background striped paper is from papermania, don't know which pack, sorry!
Ribbon: VV Rouloux


I also stitched her a personalised blanket. The rabbit is just cut from white fleece material and I embroidered the main features. I then cut out the letters from white fleece (using some chipboard letters as a template!) and then when I'd stitched them on in white I added some outline stitching to make it stand out a little. The blanket itself was from Sainsbury's (a supermarket) and has cute little hearts almost embossed on it.

Tuesday, 17 April 2012

Waltzingmouse blog party - New Beginnings

Next Blog Party on the 17th


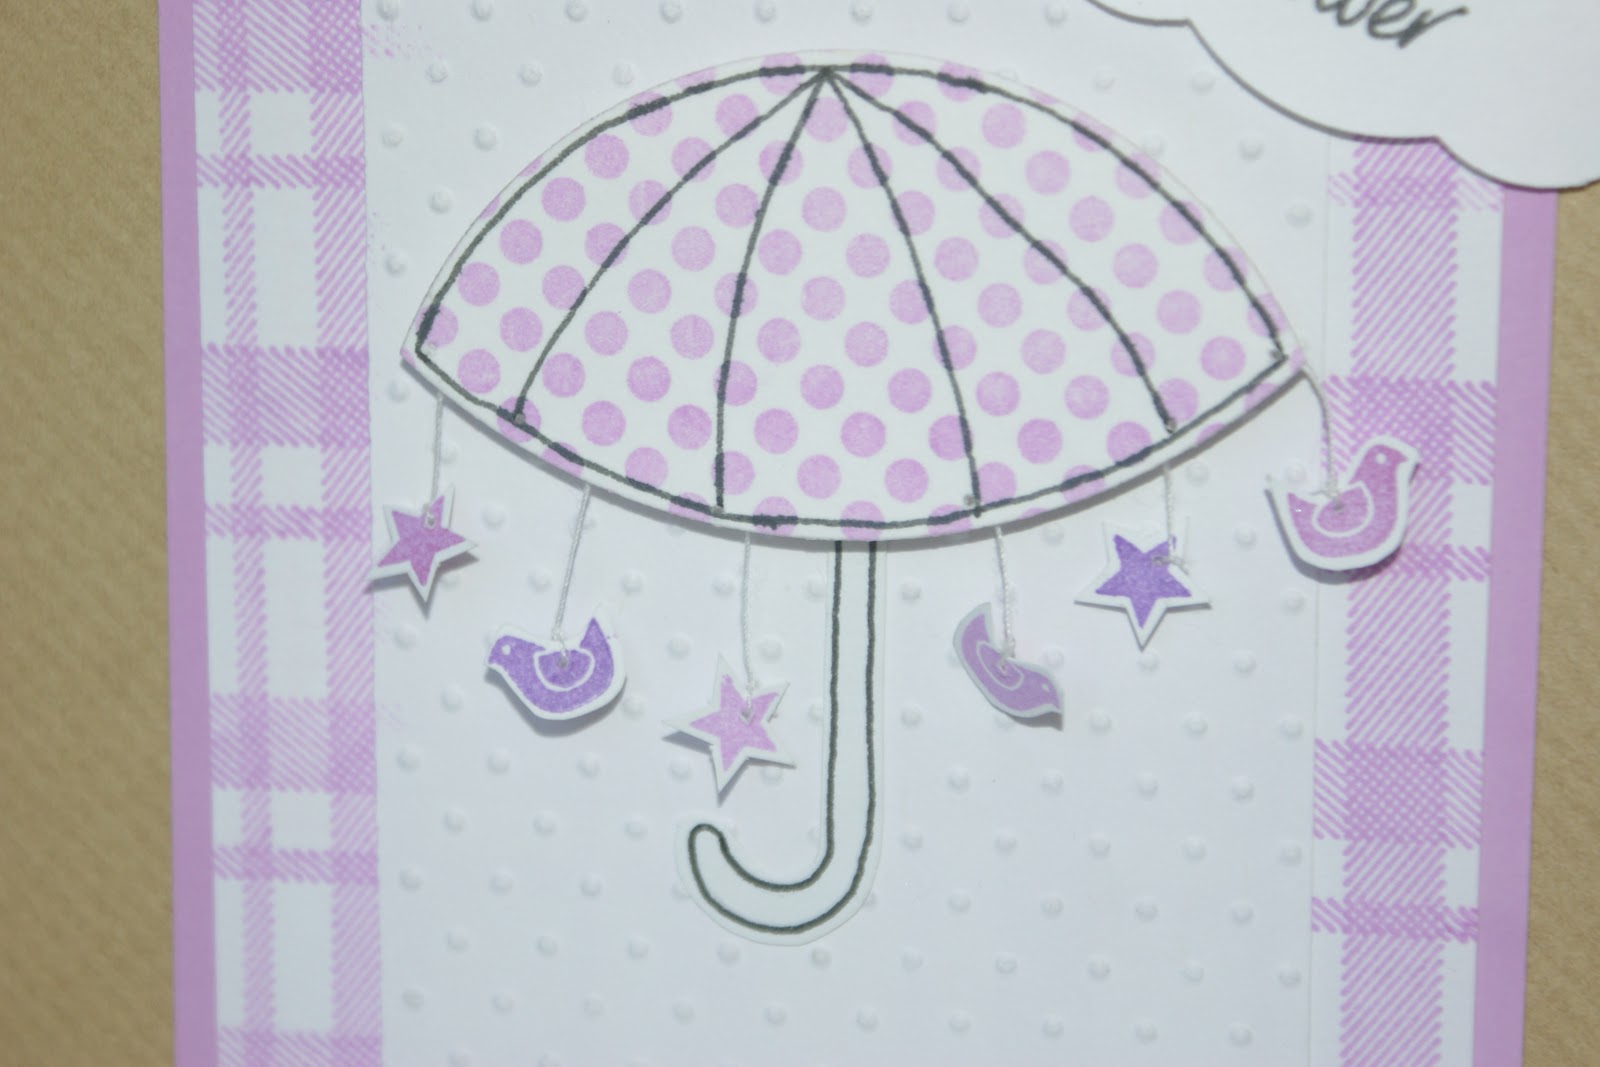
Today is the monthly Waltzingmouse blog party, and the theme is New Beginnings, I have chosen to make a baby shower card for my sister in law who is due in just a couple of weeks (so exciting!).
Baby showers are not that common in the UK, but we just have a little get together and give gifts.
My card was meant to represent a rain shower, and the main image is a mixture of an umbrella and a baby mobile.
I started off by stamping Offbeat background polka dots in lilac ink, then made a background piece using the Offbeat Background tartan/plaid in lilac. I don't have an umbrella stamp, so once I'd done my polka dots I used 2 different sizes of circle nestabilities to cut the umbrella shape and used a fine line marker to draw out the umbrella and then its handle. 
The next step was the little birds and stars which are hanging from the umbrella, these are stamped in various shades of pinks/purples and are images from the Teeny trees set. Because I was worried about them turning around I actually stamped on both sides, which is pretty handy that you have the birds facing both ways! I threaded them onto some white thread and stuck them to the back of the umbrella.
Hopefully you can see in this image that the umbrella is sat on an embossed matt (CB swiss dots) which is meant to represent the rain, and the little cloud is punched and I hand wrote the sentiment.
Finally I layered it all up, added some dimension to the umbrella with some foam pads and then did a faux stitch around the outside of the kraft card base.

I hope you like my card, and if you want to look at the other cards for the Waltz head over to the waltzingmouse blog.

Wednesday, 14 March 2012

CraftyJc Many Colours Challenge and CASual Fridays

When I saw this months challenge over at CraftyJC - Many Colours, I immediately thought of a rainbow, where else do you see so many colours?!!
So with my newly cherished Martha Stewart butterfly punch I set about punching a variety of colours of butterflies, and as they seemed a little boring on their own I embossed each with a different embossing folder.
The first card I made simply used the butterflies in a grid and a simple sentiment. Each butterfly was raised up with foam pads. The sentiment is from Waltzingmouse Teeny Trees, and I made it into a little ribbon shape to add some extra dimension.

The next card also uses some rainbow butterflies, but I just chose 6 and added a ribbon for each. The sentiment featured heavily on this card so I'm also entering it into this weeks CASual Friday challenge.
You can't see the ribbons clearly on the above picture due to the flash, so here's a clearer one.
I hope you like this little flash of many colours!!


Friday, 17 February 2012

Waltzingmouse blog party - Spring

Blog-Party-Logo 70%25


Welcome to this months waltz, and the theme is Spring.

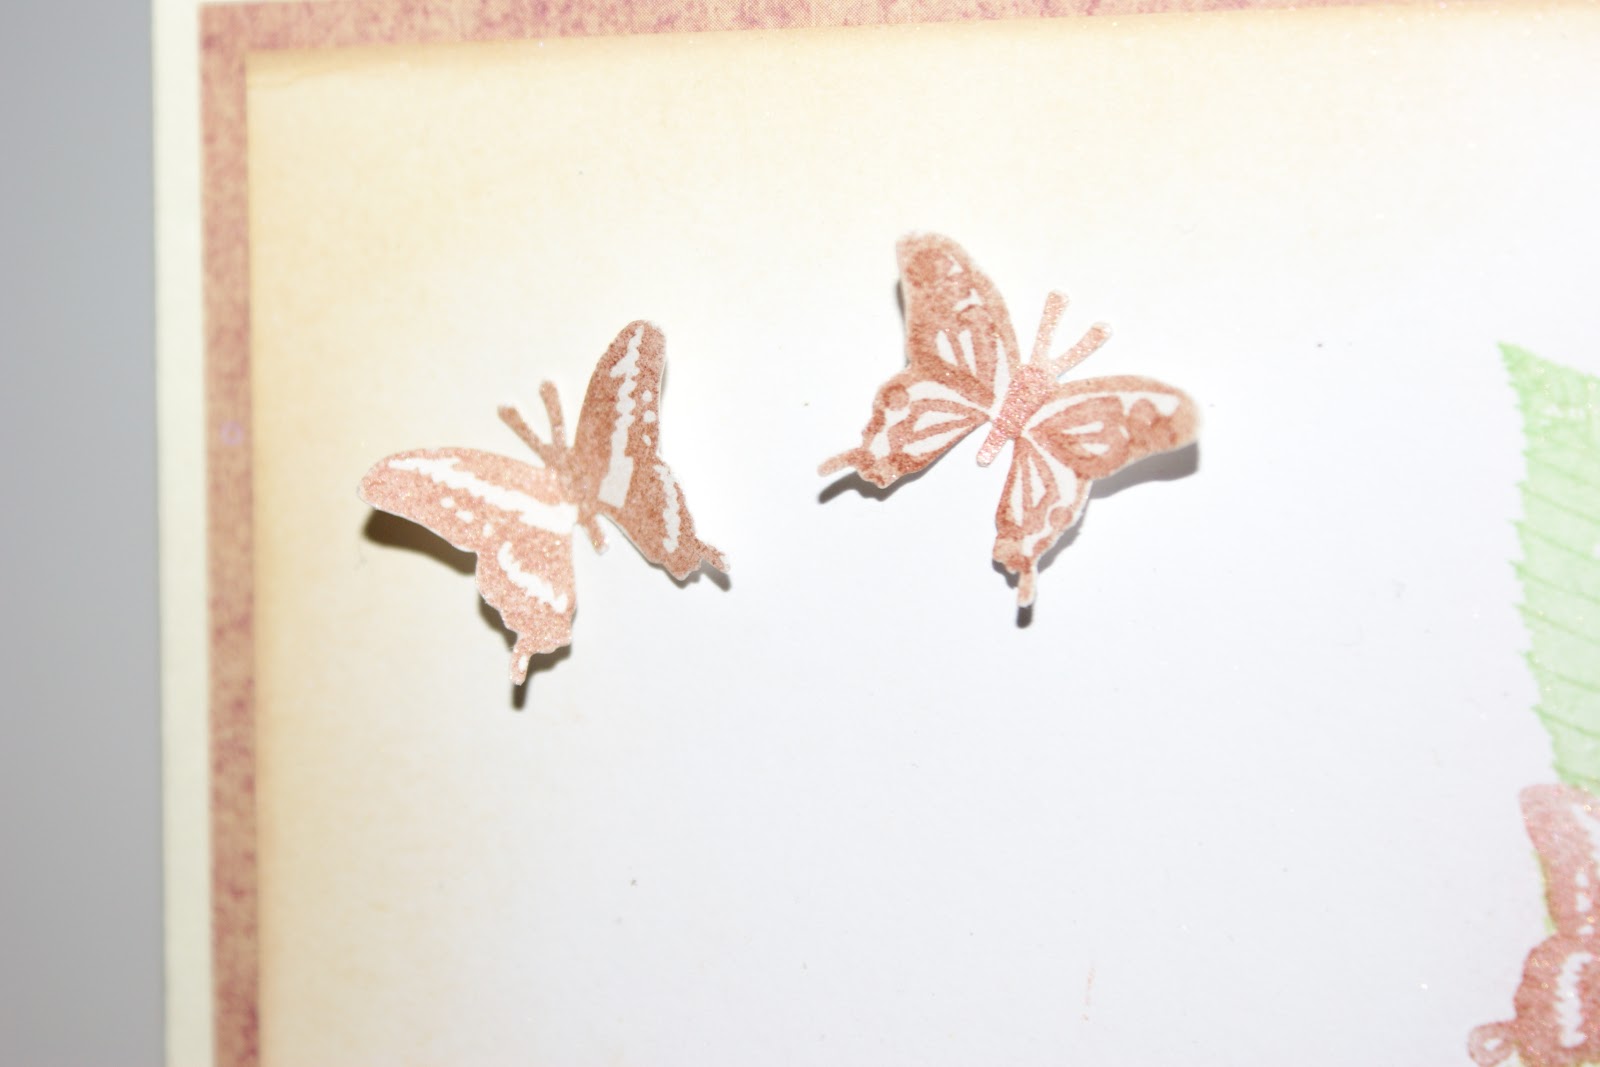
 I couldn't resist some butterflies and leaves, both of which were Christmas presents. The leaf prints stamps are from Papertrey, and the butterfly stamps are from a Martha Stewart stamp and punch set. I started off by punching some butterflies from post it notes to act as a mask, then I added the leaves, laying and masking as I went along. I added the butterflies using versamark and mica powders to give it a little shine and then did some separate butterflies on some white card to punch and use for a bit of dimension.
 I sponged all around the edge with some tea dye distress ink and then made myself a little banner with the beautiful Waltzingmouse font, the stamps are from the teeny trees set.

There isn't actually a sentiment that says happy birthday, but I masked off both the 'happy thanksgiving' and 'Birthday wishes' stamps to get the sentiment I wanted. I sponged the banner and curled it around my scissors for some more dimension. Finally I layered everything onto some burnt orange cardstock and then onto a 6" cream square card base.
I hope you like it, and enjoy my Spring inspired card!
This card is also being entered into the Prickley Pear Rubber stamp sketch challenge.

Monday, 24 October 2011

Double Rainbow!

Well today I experienced something amazing, not only did I see a whole rainbow, right across the sky, but there was also a second rainbow which went about 1/3 of the way across too. The main rainbow was SO vivid and amazing, and it made my day! Amazingly I was wearing my cute rainbow t shirt, which is covered in mini rainbows!Unfortunately we were on a train at the time and I couldn't take a photo.
 As I have said before I love rainbows, and I was going on and on about it to my 6th form students and they were telling me about a song called Double Rainbow, and one let me listen to it on their ipod! It is so funny, and puts across some of the emotions linked to seeing the double rainbow, as well as being really crazy and auto-tuned! If you want a look its on youtube (but be warned, the guy keeps saying 'Oh my God' and there is a bleeped out word at the end, so if that will offend you, maybe give it a miss).
So onto my card. After such an experience I was so inspired to do a rainbow card, and was reminded of one Kirsty Wiseman did recently for her QVC show. When I saw it I knew it just had to be CASE'd! You can see Kirsty's card here.
Here is my rainbow card
I started by using my nestabilities circle dies and cut out different rainbow coloured circles. Then I cut each in half, helping me make 2 separate rainbows.
It was my plan to ass the little sentiment circle on top of a rainbow colours scalloped circle, and this is what I made with my promarkers and little wreath die.
However, when I put it onto the card I felt there was a little too much rainbow going on (who would have thought it possible?!!!)
So instead I cut a scalloped orange piece and made it look like a sun. I had borrowed Kirsty's cloud punch a few weeks ago and cut myself loads of clouds, and so used one above my rainbow.
Finally I added some polka dot yellow ribbon and a sky blue paper background. I hope you like my homage to rainbows!
If you want to see a wonderful double rainbow image go to http://www.missouriskies.org/rainbow/february_rainbow_2006.html

Monday, 17 October 2011

Speedy the Cats Friend Challenge 77 - Seeing Double

Welcome to this weeks Speedy the Cat Friend challenge - seeing double! How appropriate that I was needing to make a card for some friends who have just found out they are expecting twins (they're going to be seeing double for years to come!!!)
The backing paper is from Matt Stack, the central piece is a nestability label 1 which was embossed with the die still in using my polka dot 'That Special Touch of...' mica mask. I then sponged with both forest moss distress ink and some Brilliance lime pearlescent ink. The ribbon is from a set of ribbon I bought by VV Rouleaux. I stamped my new Anna Griffin Monogram circle stamp onto some dark green card and embossed with white superfine powder. The central image was then stamped with a Papermania sentiment from the Sunflower sets. I also punched some little feet  into the other two circles. I hope you like it!


Thursday, 6 October 2011

OLW67 and Stamping Bee Challenge 131

Stamping Bee challenge this week is to create a one layer card, but it musn't be white. The One Layer Wednesday challenge is Thoughtsgiving, to send a card to someone struggling with a battle, and to donate to a cancer charity. 
I started with a piece of A4 craft cardstock, and stamped a Stampendous maple leaf in Versamark, and then added some cosmic shimmers in reds and oranges. I then stamped a Penny Black sentiment from the Salutations set and added some cosmic shimmers to that also. I punched some small leaves from a variety of types of cards, some textured, some patterned.

 I was completely inspired for this card by Susan over at Simplicity, you can see the card here. I also made a similar one with a white card base, and a different sentiment from Bananafrog. 

Here is a selection of the things I used.
I know who will be receiving this card, as they are definitely on my mind and in my prayers alot at the moment. The cancer charity I am supporting is The Christie, who looked after my mum, and who I ran a charity half marathon for two weeks ago.

Thursday, 25 August 2011

Rocket birthday card Challenge Card


Today I have a card which is for two different challenges. Its for the waltzingmouse sketch challenge #61 and also the new monthly challenge over at Young Crafters Unite.
The sketch we had to work from is shown here:
[WMS61-card%255B3%255D.jpg]


 and the challenge for Young crafters unite was to colour a stamped image.

As soon as I saw the sketch I thought of a moon with a rocket, as I have an amazing set from Banana Frog called Retro Space which I have been looking for an opportunity to use.
So I stamped the main rocket onto some white card and coloured with my promarkers and cut out.
The moon is just a spellbinders circle die and then I used Antique linen distress ink to give it some shading and depth. I decided I wanted a little trail coming from the rocket, so I used my trusty waltzingmouse teeny trees stamps, stamped in versamark and then used my brand new cosmic shimmers on it!
Here you can also see the background paper which is just navy paper stamped with versamark stars.


 I wanted to add some stars that were colour matched to the rocket, and so using a tip from my friend Kirsty I just used my promarkers, coloured in some white card and then just cut the stars from the matching colours using my cuttlebug star dies!
The last few finishing touches were to use some green card, punched with a Dovecraft star punch all the way along, which I placed over some matching blue ribbon. I then ripped a star ikea napkin to layer onto. I also stamped the Happy birthday sentiment (Hero Arts) onto some plain white card, and because it looked a little plain I stamped some extra teeny trees stars over the top and added cosmic shimmers. I hope you like my take on both challenges!