Wednesday, 3 October 2012

Over the hill cake...and an upcoming project!

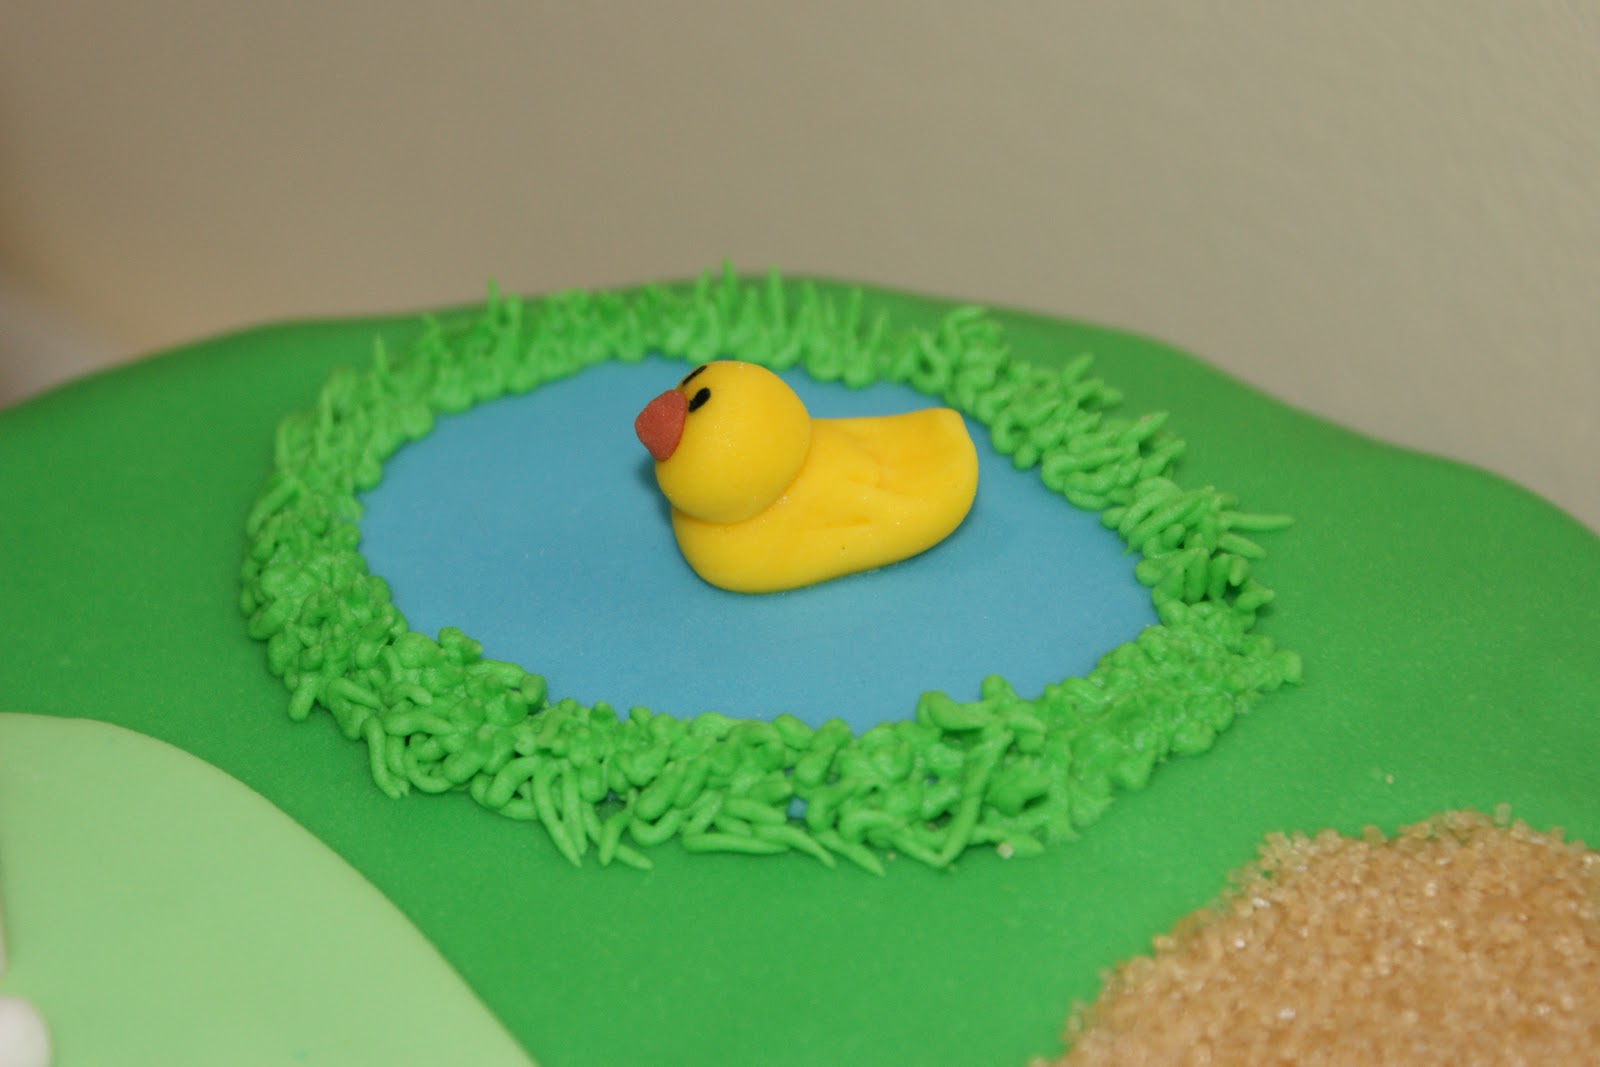
Here's a cake I have made this week for a friend at work who has just turned 50. He's a big walker, so this cake was ideal. The main base is a stack of 4x 8" cakes, and then a large and small cupcake are upside down on the top to form the hill. Its a vanilla cake with buttercream and jam.

Here's the main character, who is supposed to look like my friend Andy! (Although my character is a little bit chunky!)


Here's a little sheep, which I followed the fantastic advice of someone on youtube and used the thin end of a biro top to create the wooly texture, it worked brilliantly.
The grass is piped green buttercream (nozzle 233) and the path is demerera sugar.


My crafting has been a bit all over the show since Elijah was born for various reasons. The most recent being that we bought a lot of new storage, and so I've been rearranging all my craft stuff. So, instead of crafting I've been organising, but hopefully it will make my crafting tidier and also I will know exactly where everything is so I'll be quicker too!

Below is a picture of the main materials needed for a new craft I'm SO excited about having a try of. I've been getting bits and pieces in the post and finally the last piece of the puzzle as it were arrived today, so I will be having a go later on!!!! Watch this space!

Hope your day is filled with craft!

Monday, 1 October 2012

Baby Boy Card

Here is a baby card for some friends for the birth of their little boy Jake.
I started off by cutting and embossing a Labels 1 spellbinders nestability with the Cuttlebug New Baby embossing folder. I did this onto some baby blue card and then sponged with Broken China Distress ink. Next I cut and embossed a Labels 4 nestability in white card and using a grid mask, and again sponged with Broken China ink.  I used some chipboard letters to spell out his name.

The card blank was stamped directly with a plaid/check from the Waltzingmouse Offbeat Backgrounds stamp set (Whispers Starry Starry Night ink). I used some teal blue felt for some of the embellishments, cutting them was really easy with my cuttlebug, much easier than I anticipated, although I wouldn't try an intricate pattern. The first was a scalloped piece (Spellbinders Scalloped edgeabilities) and then I did a small cuttlebug star. To personalise the card a little more I added the little circle sentiment and the date of birth using my Papertrey Ink Postmarks set.


Saturday, 29 September 2012

Seeing Double

Here is a set of 2 (almost) identical cards for my husbands twin cousins who turn 40 next week. I wanted to use some of this lovely star design paper I have from a set of papers bought at Costco (I can't remember the make unfortunately). I used my largest cuttlebug star die to cut out from the main layer of the paper to see through to the mat underneath. I also cut some extra stars, one from kraft card and one from another star paper. I also cut some kraft numbers using my cuttlebug alphabet dies. I stamped onto the kraft star some tiny stars from Waltzingmouse teeny trees in Versamark and then distressed the edges with walnut stain. I raised up the main paper with foam pads, and also used foam behind the 2 die cut stars. I finished it off with some East of India burgundy twine.


Thursday, 20 September 2012

Baby girl card

Here is a card I made for friends when their little girl was born. Its alot more fussy that my usual style, but I think it works for this card. I started by cutting and embossing a large Labels 1 Spellbinders nestability and its embossed with Divine swirls embossing folder. I then did the same for a medium sized Labels 4 nestability and a polka dot mask. The labels 1 was then sponged with Colourbox Pink ink, and the Labels 4 was sponged with Memento Angel Pink. I added some Stampendous spots down the sides of the cards, used a flourish in the background in a subtle pink (My Minds Eye -Wild Asparagus) and also stamped a Tonic Buttefly punch with some script from the same set. I spelled out the name of the baby using chipboard letters  and then added the fantastic pink polka dot ribbon.


Wednesday, 19 September 2012

50th Golf Birthday Cake

Here is the cake I made for my husbands step mum this weekend. She loves golf, and supports Manchester City, so this helped decide the colour scheme.
The cake itself is a 9inch cake, and there are 4 layers of a lemon sponge sandwiched with lemon buttercream and lemon curd. I then coated the cake in the remaining buttercream and left in freezer to set before adding the green icing. I coloured the icing myself using colour pastes and ready roll white icing.


The 50 is cut with some number cutters from white icing, and layered onto some shield shapes which I had cut free hand. I modelled the golf clubs by hand and piped the sentiment. The golf flag is a piece of spaghetti wrapped with white icing so it held its shape and stood up completely straight.


The bunker is made with demerera sugar, the grass is green buttercream piped with a 233 nozzle. 

The cake went down really well, and people said it tasted as good as it looked!

Tuesday, 18 September 2012

Fascinating Fascinator

So last weekend was my mother in laws wedding, and I had a beautiful blue dress, and a lovely silver jacket, but was struggling to find a nice fascinator to wear. My friend lent me one on a comb, but my hair is so fine that I struggle to keep them in, and I decided the only thing to do was make my own. I googled fascinators and got some ideas, then consulted youtube for any tutorials I could find. The main problem I encountered was getting hold of the material most fascinators seem to be made from - Sinamay. Its like a natural fibre woven into fabric. Unfortunately in the time I had, and for the small amount I wanted to buy it made more sense to pick up a cheap fascinator and just customise it.
So here is my list of components
Silver voile fabric (just off the left of the page), a cheap silver fascinator (£4 from Claires' accessories), A silver alice band, silver ribbon, some feather features which I made following this tutorial on youtube (but eventually left out as I didn't like them) and some beaded wire pieces.
The beaded wire pieces are just 6mm silver plated wire, 3 of which were beaded with alternating blue and clear beads and a swarovski crystal on the end, and 5 smaller ones with just a couple of beads and a swarovski on the end.

I cut 9 pieces of the voile in rough circles about the size of a roll of sellotape, and scrunched them around the 5 smaller beaded wires which I had twisted together, building up a few circles at a time and stitching them in place. I then twisted in the 3 bigger beaded wires and shaped them. I stitched all this onto the original sinamay structure. I covered the alice band with double sided tape and then wrapped it in ribbon before attaching the fascinator.
Here you can see the voile section close up.


And here is a picture of me wearing it at the wedding!

Waltzingmouse September Blog party - part 2

Blog-Party-Logo 70%25


So inspired was I by all the amazing fall cards using teeny trees that when I needed a quick birthday card today that was the first thing I reached for, making this very quick and easy card. All you need is an embossing folder for the background, some labels die cut (nestabilities labels 4) and stamped with a sentiment and lots of leaved in fall colours. Et voila!

Monday, 17 September 2012

Waltzingmouse September Blog Party - Fall

Blog-Party-Logo 70%25


So this months blog party is based on the theme of fall, something I absolutely love. The colours at this time of year are just beautiful, and seeing the silhouette of the trees as the sun sets is something I always look forward too, so I chose to do a silhouette card.

The stamps I have used are Waltzingmouse teeny trees, my absolute favourite set. I stamped the tree and leaves in archival black ink as I was going to be sponging the distress inks and I didn't want any smudging. (I used Antique linen, Tea dye and Barn door distress inks). I have a little maple leaf punch which I used along the bottom of the background paper (some scrap wallpaper) and then added 3 strips of gold ribbon and the sentiment.

Here's a close up of the tree with its fallen leaves.

If you'd like to continue on the party head over to Waltzingmouse now.

Saturday, 8 September 2012

Vintage postage bottle label

Here is a vintage tag I made for a friend. I love the look of kraft, and using versamark on it is a great way of stamping. Most of the images you can see are from the Papertrey Ink Postmarks set. I have the matching stamp die which I used to cut out the little bee stamp. The polka dot background is from Waltzingmouse Offbeat Backgrounds. The main stamp on this is the Fragile, as it will be attached to a bottle of wine!!

Saturday, 1 September 2012

Fantastic Ribbons Design Team - Washi Tape


It is my great pleasure to be able to let you know that I was recently asked to be part of the wonderful Fantastic Ribbon design team. Along with 9 other lovely ladies I will be bringing a ribbon related project to you every month. This month we are highlighting wonderful washi tape!
I've never worked with washi tape before, but seen it on lots of blogs and thought it looked really interesting. What can I say other than "AMAZING!"
The best way to describe it is like patterned masking tape, its slightly translucent and not too sticky, which means its easy to reposition. I have 2 cards to share which highlight how fantastic washi tape can be as an addition to any card.

The first card I have used two different designs of washi tape(stripes from Art Deco and green polka from  Dolly Mixture) and I just wrapped them around some scrap white card alternating each pattern. You could do this with as many different designs as you can get your hands on!
The next thing I wanted to try was paper piecing! With the washi tape being self adhesive it means you don't have to fiddle around with the tiny sections getting glue everywhere!
Because you're not dealing with a block of paper you have to stick the washi tape to a non slip surface like a craft mat. I lined up the stripy pattern for her skirt on two separate pieces of washi tape, and her beret and waistcoat fitted on a single piece. 

Here's a close up of the finished girl with her washi clothing!

Stamps: Kirsty Wiseman - Petit Bug, Paper smooches - Simply said


My next card is completely CAS! I took the stripey washi tape and again wrapped it around some scrap white card, but this time left a narrow gap between each strip, and then used some embroidery threads in rainbow colours between each strip. A bold sentiment over the top is all that this card needs! I think I'm going to have to order loads of rolls of this stripe, as its just amazing!
Stamps:  Paper smooches - Simply said

For more washi tape projects from the Fantastic design team keep an eye on the Fantastic Ribbons blog.

Bx

Wednesday, 8 August 2012

Missed challenges and cake baking

Well the most annoying thing happened this week, our laptop charger exploded (and the explosion bit is no exhaggeration, we have a black mark on the socket to prove it!) and so we haven't been able to use the laptop. If that wasn't annoying enough I had made 3 cards last wednesday for 3 challenges...none of which I was able to post. Doh. Oh well, they were all cards that were needed for birthdays and special occassions, but I really wanted to enter them into the challenges (OLW, Less is More and Play Date Cafe).
Today at my little boys nursery they are having a bake sale to raise money for a little boy who needs cancer treatment, so I made a selection of cupcakes for them
A selection of cupcakes I made for Joeys nursery bake sale. Lemon, banana choc or double chocolate.yumyum. http://instagr.am/p/OEmAE7Rc8p/
The top ones are chocolate with chocolate buttercream and choc bits. The middle ones are lemon drizzle with lemon buttercream, and the bottom ones are banana spice muffins with chocolate buttercream.
Its great to do some baking now I'm feeling a little bit better, and I'm loving my new stand mixer which I got for our wedding anniversary a few weeks ago!
Photo: Trying to work out what the first thing I should make with my anniversary present! http://instagr.am/p/NdskNjRczO/

Have you ever spent a long time making something for a challenge and then forgot/not been able to enter it?

Sunday, 5 August 2012

My little man is 3!

I can't believe its been 3 years since my son was born, it seems to have passed so quickly! The strangest thing is that as soon as I had Elijah, Josiah seemed to grow about 4 inches instantly! He has been really good with his little brother the last 6 weeks and very understanding when I have had to make him wait for my attention, something he hasn't had to do before. As I haven't been feeling very well we hadn't organised a party for him, and I didn't even make him a cake, but the week after Elijah was born I did spend a number of hours making him an A2 size card to send into the BBCs childrens channel for the birthday slot.

 I printed off black and white colouring pages from here and coloured them in with my promarkers, cut out all the images and some seaweed, and even adapted the Octonauts logo for his name. You can imagine how disappointed I was that they didn't show it (they only show about 1/2 of the cards they get sent). Its also pretty annoying that it cost me a fortune in postage to send it!
The pirate outfit he is wearing in the picture he wore to go to the cinemas yesterday morning to watch The Pirates in an Adventure with Scientists, which was excellent!
I only managed to make him a hastily made birthday cake, which is just a sponge with raspberry jam and buttercream filling. I have decided that as I'm feeling alot better this week that we might plan a small party for him in a couple of weeks time when alot of our friends are back from holiday, so I will be attempting a more impressive cake for then!