Thursday, 21 April 2011

Waltzingmouse sketch challenge #43


Good evening, I thought I'd share a little card I made yesterday. Its a real quickie, as I only had 20 minutes max between all the many things I had to do. It was my last opportunity to take part in this weeks challenge, as I'm away from my craft room for a full week.
Anyway, in keeping with this weeks sketch over at waltzingmouse I made a simple sentiment with little embellishments.
[43-Sketch3.jpg]

I used a little Label 4 nestability for my sentiment, then used my teeny trees stamps to create some leaves. I stamped the small raindrop shape in pale green, then used the tree trunk stamp in a darker green to create the leaf veins. This picture isn't great, but it shows them before I cut them out.
I then stamped a Banana Frog sentiment onto the nestie, and gently sponged the edge with some distress inks tea dye. The top of the 5" white card was embossed with my new favourite folder, swiss dots. A nice brown ribbon, and some glue and I was done double quick!
Hope you like it!

Sunday, 17 April 2011

Waltzingmouse Easter Blog waltz


Well I'm so please to be taking part in this months blog waltz, because Easter is an incredibly important time of year for me as a Christian, its pivotal to my faith that Christ was crucified and then rose again victorious!

So I scratched my head to figure out how I could incorporate my waltzingmouse stamps into an easter card!
My idea was to use the tree stamps from Teeny trees to create a tomb scene from when Jesus has risen and the stone has been rolled away.


Here's how I did it!

I started by stamping the large oval stamp in pale yellow and warm orange. I masked the bottom half of the oval to make it look like a tomb. I then stamped the small random tree shape in a dark brown to look like the stone was rolled away. Again I masked the bottom to create the ground. I had stamped these shapes onto post it notes and cut out so I could then use them to mask for the inside of the tomb. In black ink I stamped the same random tree shape using the mask. Once I'd done this I added some trees, and then using the main oval mask I sponged the sky using cracked sapphire distress ink, and the bottom using forest moss distress ink.

This shows the masks I cut out to help me stamp my scene.

I then used my cuttlebug and nestabilities circles to cut my scene out, and then layered it onto some sage coloured suede effect  paper, also cut out with a circle die.
I cracked open my brand new Swiss dots embossing folder which I have been wanting for months, and was very kindly bought this week by my dearest Honey! Its just as AMAZING as I had hoped!
I only embossed the top part of the card (5 1/2" white card) onto which I had already printed the phrase "He is risen!" via my computer.
Inside I have also printed 'Jesus said, "I am the resurrection and the life. He who believes in me will live, even though he dies;and whoever lives and believes in me will never die. " John 11v25-26'

A quick ribbon knot and some glue and that was it!
I am really pleased with the way it turned out, especially the ingenious use of the teeny trees stamps to create the scene!-even if I do say so myself!!!!!
I hope you like my card, and have a blessed easter, reflecting on Christs sacrifice for us.

Saturday, 16 April 2011

Lila Bug card with Sanderson papers


 Good morning! Today I have a card that I'm really proud of, as its outside of my comfort zone! Firstly it has a figure for an image, and secondly its not greens/naturals! (well a little green snuck in!!)
Last week my lovely friend Kirsty came over for a crafty colouring in night. She brought with her some of her new stamps for me to have a play with, and first up was Lila Bug.

I love the retro style of the bugs. My first thought was to paper piece her dress, so went through my scrap patterned paper and found this lovely green patterned Basic Grey paper. I stamped her onto the paper and just cut out the dress. I also stamped her wings on some centura pearl card which gives them a lovely sheen - you can see it better below. I had a little Promarker tutorial, as Kirsty is amazing with them, and has loads of colours which I don't, and I'm really pleased with the way her face and hair turned out. (My camera isn't great, so you possibly can't see the shading)

As we mainly focused on colouring on the night I left making this card for another time, and in retrospect would possibly have chosen my background papers first! But thankfully I had something which I thought would work. I have a few Sanderson wallpaper postcards, and also some samples of the actual wallpaper (my dad has a wallpaper company, so sometimes he gets sent this stuff) and I just love this pattern (infact I'm sure I've seen this pattern in John Lewis as a gift wrap!), its called Dandelion Clocks. The postcard is a much smaller version of the pattern, but I used a section of one of the full size wallpaper dandelions to create the lined strip behind Lila, and layered it onto some cool tight stripe orange paper.

Lastly I added some ribbon in black and orange, and then a small sentiment, with a scalloped circle in orange behind, cut on my cuttlebug. I finally just gently distressed the sentiment and scalloped circle with some distress inks.

If you like the look of Lila, here are the other bugs you can buy as digis or polymer stamps, and are available here.

Friday, 8 April 2011

Easter cards and baking night


So last night I decided (on the last minute!) that I wanted to make Easter cards for my colleagues. At Christmas we got 3 snow days for the last days of term, so I never got round to even writing Christmas cards for the people I work with! As I actually feel Easter is a more important celebration for me, so I decided that I should use the opportunity to make some cards. The end of term has kind of crept up on me, and although I am in next week doing some revision classes, I won't see the majority of people. So last night, at 8pm, I set about making 15 cards...oh and baking some easter treats too. I really am crazy sometimes!

I spent half the evening bouncing up and down the stairs from my craft room to the kitchen baking my 'best chocolate cupcakes'.

I decided to try and keep the card relatively simple, and wanted a clear Christian message, not bunnies and chicks. I chose to print off the sentiment (Forgiven) and inside verse ("Christ bore our sins in His body on the cross." 1 Peter 2 v 24) as I didn't have any suitable stamps.

I used my trusted Labels 1 die to cut the frames, and improvised with a Waltzingmouse stamp which is actually a branch from Teeny trees, to make the cross. I suppose this could have been hand drawn, but at one stage I was considering embossing it in black. I used forest moss and tea dye distress inks to add some colour, and then inked around the edges of the frame with some more forest moss.

The cupcakes I made last week for the school fair were good, but I still wasn't 100% sure about the frosting I had improvised. So yesterday whilst in Hobbycraft I was perusing the cake books and looking for inspiration. I read the Martha Stewart recipe, but it was too complicated to memorise, so I stuck with the Hummingbird bakery version, which I could easily remember! (300g icing sugar, 100g butter, 40g cocoa, 3 tbp milk)
I must say it was 10x better for piping, and really tasty. I topped them with Asda's tiny little easter eggs.

This is a picture of some of the extra ones I kept at home for Monkey and Honey.
I had some great comments today, and I really do think this may be the best chocolate cupcake recipe, and now with this new buttercream its on a new level! Even I liked it and was tempted to eat a second one (although I love baking, I'm actually a savoury person!).
Well after a busy night yesterday, I'm having a nice relax tonight. Hope you are too!

A quick birthday card

So it was my collegues birthday last week, and as it was a special one I wanted to make a card with her age on it.
After making my Aunts 60th Birthday card recently I decided to follow a similar style - hand cut numbers then embossed and sponged. I printed off the outline of the numbers on the computer and then embossed in my bug with Divine swirls. I used tea dye and cracked sapphire distress inks,  matched the colours of the papers I'd chosen. I layered it onto some nesties labels 1 that I had in my scrap box and then used some scrap patterned papers to make the background. A little ribbon finished it off, and I then layered it onto some black paper to finish!
Quite quick and easy when you've decided on the elements. I love the look of the embossed numbers, and am sure this won't be the last time I do it!

Monday, 4 April 2011

I won a blog award!

Ok, so I won a Liebster Blog award from the lovely Rachel at Prescription: Craft Often. Thank you so much Rachel for the honour!

This is a great way to share blogs that may not be getting recognized (although I picked a variety!). Here's what the Liebster award is all about:


The rules to this award are:
1. thank the giver on your blog
2. link back to the blogger who gave you the award
3. copy and paste the award on your blog
4. Give the award to 5 other blogs.
5. let them know you chose them by leaving them a comment

I'm excited to pass this on to 5 blogs that I find lots of inspiration from!
 
In no particular order they are:
 
1. http://re-crafts.blogspot.com/ - a great site for recycling inspiration
2. http://peppermintpattys-papercraft.blogspot.com/ - I am inspired by Karins stamping
3. http://ginghamgirlsadventures.blogspot.com/ - I love Kellys stamping style
4. http://caninesandcarddesigns.blogspot.com/ - A fellow crafty mathematician
5. http://andthewordbecameart.blogspot.com/ - Some heartlifting scripture done beautifully


Sunday, 3 April 2011

Happy Mothers Day

Well today in the UK it is Mothers day, a day to treat your mum and let her know how special she is. I'm very blessed to be a mum myself and was treated to a lovely cooked breakfast, had my lunch cooked for me, and then dinner too - although my Honey takes credit for that, as Monkey isn't old enough to cook yet!. I also got an amazing homemade gift, which they made when I was away last weekend. I was so suprised, but its amazing!I'm going to put it up on my craft room wall, I'm so proud!
Its done with finger paint, and the pictures from left to right are:
Me and Monkey when he was 4 months old
Monkey when he was 12 months old
Monkey with my mum when he was 12 months.

Below is another picture of Monkey with my mum on the weekend of his 1st Birthday. This was taken a couple of months before she died from Cancer.
Today has been quite strange, as we would have always spent the day together on Mothers day. I also felt pretty guilty, as last year I didn't get round to making her a card, and bought one instead and she was really disappointed. I made one for her birthday a little later in the year which was really nice, but all this was before she was diagnosed. No one could have guessed she would be taken so quickly, just 2 months after being diagnosed. It really makes you think about the people you love, and making sure you let them know how loved and appreciated they are before its too late.
At least I know that we'll see each other again one day in Glory.

School Bazaar Cakes!

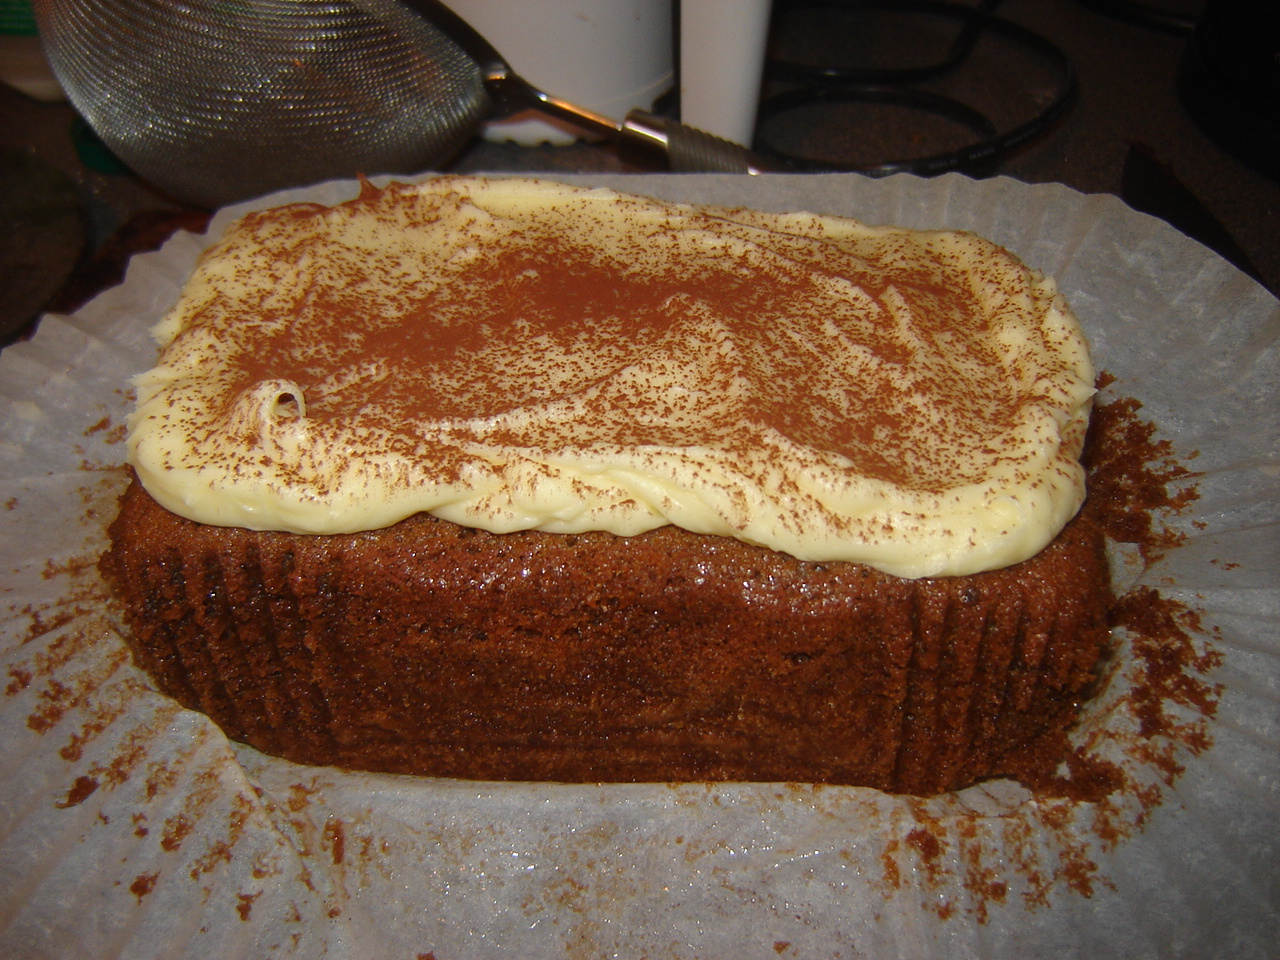
Well yesterday - Saturday was our school fundraising bazaar. On friday I baked cakes to sell in the staffroom to raise money from the staff. It was a veritable feast, Parnsip and Maple syrup (the handsdown favourite), Coconut sponge, Cappucino loaf, Carrot and walnut,  and Cherry and Almond cake.
 Cappuccino Cake
Coconut sponge with jam and buttercream.
A couple of friends baked too, a lemon drizzle and a chocolate cake. We sold them for £1 a slice and made £99! Not bad!
Then yesterday we had a home made cakes stall at the actual bazaar for the parents and general public. I made my 'Best chocolate cupcakes ever' 
and also some lemon meringue cupcakes - Lemon sponge, lemon curd, then meringue icing on top!.
The meringue icing is amazing, so glossy and very scrummy, if you'd like the recipe its here. It pipes really well too. I had a little left over and used it on the chocolate ones which looked nice!
Here they are in my amazing new cupcake carrier which I bought from Costco on thursday. I saw it and it was like a Eureka moment, and I knew I had to have one! It is a cupcake tin on the bottom, the the double layer for displaying, and the lid for carrying.
Here it is with the top on.
It was quite a strange experience at the actual Bazaar - bizarre bazaar!- because other people had baked cupcakes and put loads of effort into the decoration - silver balls, sprinkles, edible glitter etc - but I'm a plain and simple girl, for me its all about taste! As a result no body wanted to buy mine!!!lol!!!
It was quite humbling actually, to go from almost cult baking status in the staffroom, to being a nobody and noone wanting to buy my cakes! Anyway, when all the pretty ones had gone mine finally sold!
I haven't heard the total raised yet, but its all good! 

 Hope I've inspired you to bake today!

Wednesday, 30 March 2011

Best Chocolate Cupcake recipe?

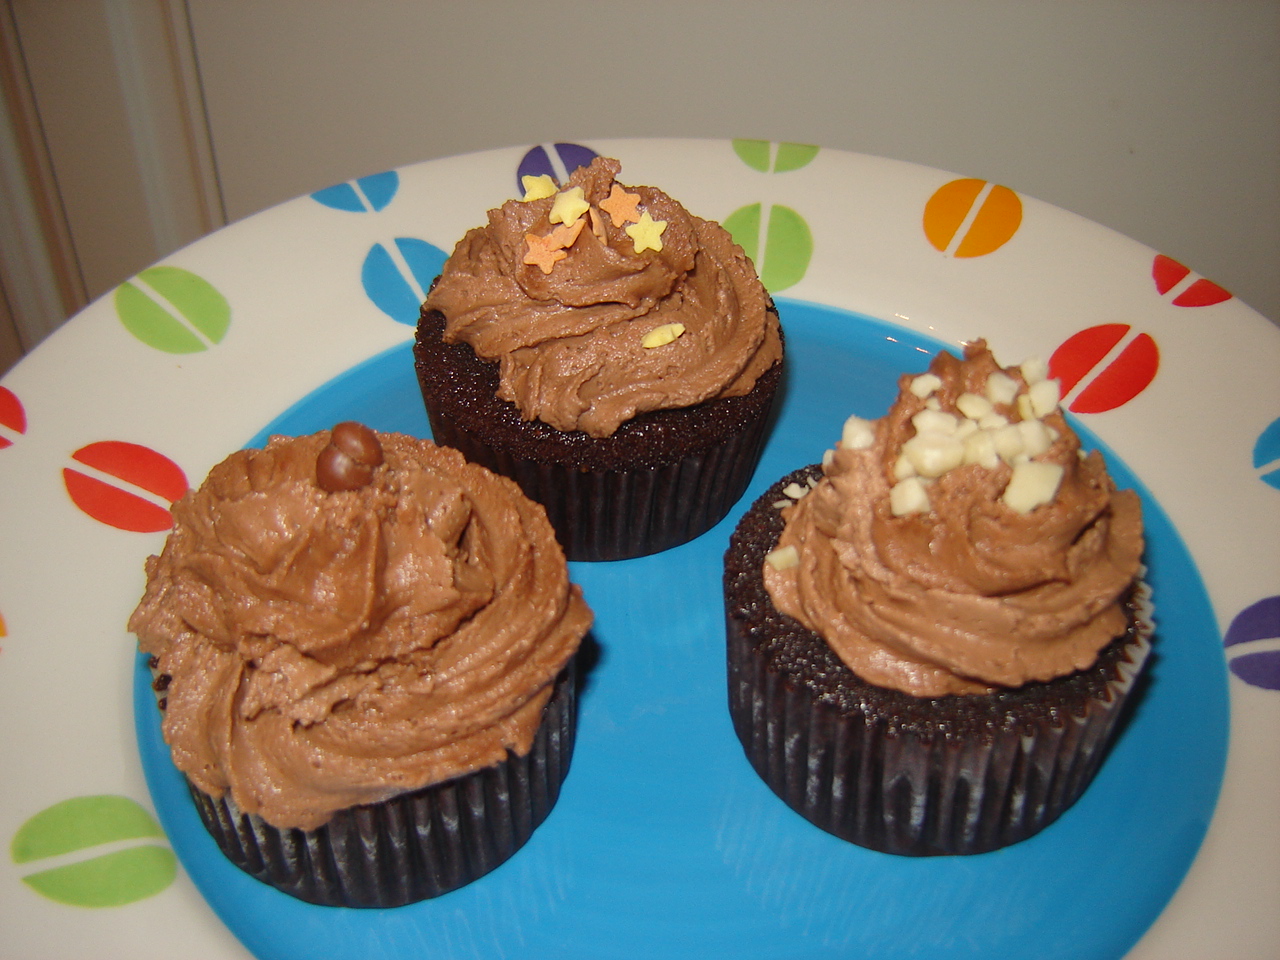
So today I am testing a recipe I found online making the claim of being "the best chocolate cupcake recipe". For our school bazaar on saturday I'm doing ALOT of baking, so imagine my suprise when Honey came home tonight and sheepishly said "theres a cake sale at work tomorrow for mencap" and I replied "I'm already baking about 6 cakes, and 48 cupcakes for the bazaar!", however I decided that I did need to test out this new recipe I had found online, so have made some anyway!
Here's a few piccies (I apologise for my bad photography skills, I wish I could take better pictures!)

My piping skills need a little practice, but I'll be making these again on friday!

So for anyone who is interested, heres the (slightly quirky!) recipe for 20-30 cupcakes (depending on your tins!):
I apologise in advance, this is in cups, as its an american recipe, and I don't know the metric equivalents!
You just need to buy a set of cup measures, they're only a few pounds!

2 cups sugar
1 1/4 plain flour
3/4 cup  cocoa powder
1 1/2 tsp baking powder
1 1/2 tsp baking soda
1 tsp salt
2 eggs
1 cup milk
1/2 cup vegetable oil
2 tsp vanilla extract
1 cup boiling water
Heat oven to 180 degrees (350 farenheit). Combine the dry ingredients in a large bowl. Add eggs, milk, oil and vanilla; beat with electric whisk on medium speed for 2 minutes. Stir in boiling water. The batter will be thin, don’t worry about it. Pour into muffin tins, about  60% full. Bake at 180 degrees for about 22-25 minutes. Cool and then add your chosen icing. (Don't overfill the cases as they will rise, and just spill over!)

I decided to create my own buttercream icing, a bit of an experiment, but it tastes good! This is metric, as I made it up myself!
125g butter (room temp)
250g Chocolate spread (like nutella, but I just used Asda's)
175g icing sugar
First beat the butter and chocolate spread, then gradually add the icing sugar (too much too quick and you'll disappear in a white cloud!).Eh voila!

Here's the original post I found, with a much better picture.

Monday, 21 March 2011

Card Patterns Sketch 107


So here's my take on this weeks sketch. I needed a 50th Birthday card for a friend, and decided to use this sketch and make it a little more masculine by using black and white and instead of scalloped edges a zigzag - done on my ultimate pro embossing board. The stamp shape is a die I got with my cuttlebug, and the numbers are Banana frog, and done with black embossing powder. Some faux stitching, ribbon and a few brads finished it off! Hope you like!

Friday, 18 March 2011

Comic Relief Cakes!


Well as today is Comic Relief day (or red nose day!) I have baked!- for those outside the UK Comic Relief is a charity day to raise money for a whole range of worldwide causes but the main focus of fundraising is comedy, or doing something funny. As a teacher we are always at the centre of fundraising efforts, and mine tend to be based on baking. We have another event in a few weeks, our main school fundraiser, so my baking for today was quite limited. I decided to make simple cupcakes with their own red noses (cherries!) but couldn't decide on what icing to do, so did two.
I am trialing a meringue icing, which although I've never made in this way before is the one I like best.
I also made a classic buttercream icing, which my husband liked best.
In the picture the meringue icing is white and the buttercream pink (I just needed a way of identifying them!).
I just blobbed a bit on top and used a fork to give the lines (I didn't want to dirty my piping bag for just a few!!!) The merigue is a lovely shiney, glossy finish and spread really well. The buttercream wasn't quite so easy to spread and would need piping properly!

I'm going to gauge peoples reponse to the different icings to decide on which to use for the next fundraiser. Personally, not only do I like the taste of the meringue, but its much better for you (icing is about 200cals per cupcake, meringue is approx 50cals!) , and as it uses mainly only sugar and egg whites its a more cost efficient icing!

Meringue Icing Recipe - approx 18 cupcakes
2 egg whites
150g sugar
60ml golden syrup
pinch of salt

Mix egg whites, sugar, syrup and salt in a large bowl until combined. Put the bowl over simmering pan of water and whisk until the sugar dissolves and mixture is hot (this ipasturises the eggs). This takes about 3 minutes. You then take the bowl off the heat and using an electric whisk beat for about 7 minutes until you have stiff peaks and a cool mixture. If you want to add flavourings add them now (vanilla, etc). The icing is ready for using.

Buttercream Icing - appox 12 cupcakes
125g butter - room temp
250g icing sugar
a few tsp milk

Beat the butter and add the icing sugar gradually and beat until combined. Add milk 1 tsp at a time until the consistency you want.

Have a try at meringue icing, I know its a bit more involved to make, but its definately worth a try!

Thursday, 17 March 2011

Waltzingmouse Blog Waltz - St Patricks Day

Welcome to the Waltzingmouse Blog Waltz!
Well here is my take on St Patricks day! I must admit when I first saw the theme I was like "oh no!". The only things I could think of were green leprechauns, shamrocks, rainbows and pots of gold. (very stereotyped but hey!) I had no inspiration whatsoever, but I asked for help over on the waltzingmouse forum, and someone suggested celtic. Well that was all I needed! I've loved celtic knotwork for many years, and was bought a celtic design book for my 15th birthday (almost 15 years since!). It gives instructions on how to create your own hand drawn celtic knots. So I dug it out and found a few designs to do. Heres a link to the book if you're interested Celtic Knotwork designs

The book gives really detailed instructions, so its pretty easy, but very satisfying!
The first thing I did was do a grid on some watercolour paper, and it was made much easier using my rolling ruler, as it has little holes you can use to do the dots!

The next thing to do was copy the pattern and add the drawing in pencil.

Sorry if thats very faint, but its in B pencil! I then went around the outline with a fineline marker and erased the pencil marks.
Heres a picture with the 4 designs I'd chosen to try.

I'll be using the others in weeks to come, so keep an eye out for more celtic stuff!
I decided to paint the inside of the design with distress inks, as I wanted a more subtle green, and its easy to use with water.
I started by using very strong colour around the edge, then watered it down and added a middle layer, and finally I used just water to blend the whole design.


Now the design was the easy bit, I then had to decide how to make the card, so I cut the design using my nestabilities circles, and layered it onto some suede paper in a sagey colour that matched really well.
I used a plastic circle mask and put the white 5" square cardstock through my cuttlebug with my No More Shims embossing mat. This gave a great pattern which complimented the design. I wanted to incorporate some gold into the card (well gold and green are very Irish!) so I used my gold ink pad and brushed it over the embossing. I also used a sponge to add the gold ink to the edge of the card and around the design.

I finally used the walzingmouse free irish designs from last year, and printed off on my computer the "Emerald blessings" sentiment and then cut it down to say just "blessings". (I don't have any irish friends, or anyone to make a St Pats card for really!). I layered it on the sage suede again and stuck it onto the cardstock using some 3D foam pads!
I hope you like my take on Irish!