Showing posts with label stamping. Show all posts

Tuesday, 21 March 2017

Testing Supplies in My Journaling Bible


As I said in my last post I've been Bible Journaling every Sunday night since January, and wanted to start blogging about it too. I've given up Facebook for Lent, so have found myself with a little bit more time and am hoping to get some of my pages up on here soon, along with the process I used to create them. I'm hoping I can show people that it really isn't that daunting to get started, and point people in the direction of my favourite supplies, youtube channels, and top tips!

I'm also in the process of helping plan an Introduction to Bible Journaling event over at 10ofthose in Leyland, which will give people a chance to look at the journaling bibles in the flesh and also have some work stations for people to give it a go. It's exciting, but a little intimidating too as I've only been doing this a short time myself!

Back to my first steps into Bible Journaling!

I'm a control freak. There, I said it. I am an information junkie too. When I start a new project I like to get AS MUCH information as I possibly can. Whether its planning a holiday and trawling Trip Advisor for ideas on where to stay, and what 'must see' attractions there are, or planning a lesson and googling the life out of the topic, I just like knowing stuff.
So when it came to starting Bible Journaling I wanted to get clued up as much as possible. I read as many Bible Journaling 101s as I could, watched Youtube Bible flip throughs, and decided the first essential thing I wanted to do was test out all my craft supplies. Over the years I've accumulated a wide variety of craft supplies relating to card making and paper crafting, and just general craftiness, so I wanted to see what would be okay to use in my Bible.

Things I wanted to test:

Pens


Pencils

Paints

Stamping inks

So I set about systematically testing these at the back of my new journaling bible in the Bible Reading Plan pages. I would be looking for ghosting, or bleeding through the pages.

Now bibles are not your everyday book pages. They are very thin, mainly to reduce the thickness of the bibles we carry around. The paper used in Bibles weighs around 40-50 gsm, compared to photocopier paper which is 80gsm, or lightweight card being 160gsm, so you can see its very thin! This does mean that the bible text, or indeed anything your put on the paper, may show through to the other side. I'll refer to this as ghosting, where you can see a faint image through the page.
This is inevitable when the paper is so thin, and is accepted throughout the world for Bibles. As long as it does not distract from the words being read it is fine.
So we will consider ghosting an acceptable outcome of Bible Journaling.

What I consider to be unacceptable is bleeding. This is when the ink/paint actually soaks through the paper to the other side, and is unsightly and distracting. I wanted to whittle out any of my supplies which would bleed through, as this was a definite no-no for me.

This is what I found.

Results
Pens
This is the front of the page I was testing on

And this is what you can see on the back of the same page.


Letraset Promarkers - These bleed straight through the page, do not use unless page prepared
Letraset Aqua Markers - With a single layer they ghost, but a second or third layer will bleed
Mozart Brush Pens - These bleed through
CalliCreative Italic Pens - These bleed through
Sharpies- Fine Line and standard - These bleed through
Calli Metalic Pens - Ghost through
Derwent Graphic Fine Line pens 0.05-0.8 - Finer points ghost through, thicker tips bleed in places
Tombow Brush Pen - Ghost through
White Calli Italic - Not visible
Highlighters - Bleed through on the edges


So does that mean I have to throw out all my lovely pens??? NO! You just need to spend a little time (and money!) preparing your pages if you're going to use them. I've been using Windsor & Newton Acrylic Matt Gel Medium, but a lot of people like to use Clear Gesso (I already had the matt gel medium, so I thought I'd try that first!).
Here's what the back of the page looks like when you prep it first!!


When Acrylic Matt Gel Medium is used all the pens that bled through (including the pro markers!) didn't bleed through at all, although they do still ghost. One thing to consider though is that any ink you place on top of the medium will not soak into the page (which is good!) but that means they sit on the surface and take longer to dry, meaning if you're not careful you might smudge them (which is bad!). The colours are also a little less vibrant too.

Pencils
Stabilo Chalk Pastel Colouring Pencils - Light ghosting, more obvious if activated with water
Derwent Studio Pencils - Not visible unless activated with water, and then they ghost through
Standard Childrens Pencils - Not visible
What you might notice is the difference in pigmentation between the cheap basic children colouring pencils and the Derwent Studio artists pencils. The Stabile CarbOthello chalk pastel water soluble pencils are even more strongly pigmented. So although you can use any pencils in your bible, you do in some respects get what you pay for.


Paints
Watercolour paints - Ghost through
Acrylic Paints - Ghost through

The acrylics go on really well with a credit card or old store card, and if you put it on in this way you can still read through the paint. However, the green and blue colours I have were a bit grainy, and too dark for my liking, as they make it quite hard to read the text, so personally I would definitely limit the use of these colours to the margins. What is brilliant though is how vibrant the colours are, and they don't bleed through, although as you can see they do ghost through. Also if you write or stamp over the acrylic it doesn't show through either!

Inks
Memento Inks - Tuxedo black, Lady Bug red, - Bleed through
Tim Holtz Distress inks - Cracked Sapphire, Barn Door, Bundled Sage, Peacock Feathers
If stamped they bleed, if used on a sponge then they are a thin enough layer to just ghost
Archival Ink - Jet Black - Bleeds
Whispers Archival - Starry Night - Bleeds
Adirondack - Denim - Bleeds

This is the back and front of the same page when I was testing out the stamps.


Most of these inks do not bleed if you stamp off excess ink before then doing your second stamp on the page, but ideally prep your page. They also won't bleed through if you use a medium to prepare your page first or stamp over acrylic paint, but they will still ghost.

This is what I've found so far, I'll update when I try new supplies or new techniques!

Next time I want to talk about Faux-ligraphy and fonts!

Saturday, 25 January 2014

Kraft Flower cards

Here are a couple of cards I made recently for friends who were starting new roles at work. I wanted to make something simple yet classic. I love these Waltzingmouse stamps, but couldn't find a matching stamp that said new job, so printed out the sentiment onto some white card and then stamped onto that. Some basic sponging (Distress ink tea dye) around the edge, a thin ribbon and layered onto some kraft card finished this off.

This hyacinth is one of my favourites!

Wednesday, 20 November 2013

Fall Leaves Wedding Card


Here is the wedding card I made for one of my best friends who recently got married. She wanted a vintage Autumn theme wedding, complete with Fall Leaf cake and all the vintage extras. I decided to make a card which tied in with both these things. I think the little love birds in the tree work well for a wedding card, but this card could easily be adapted to have 1 or no birds in the tree, and with an alternative sentiment.


I even used some of my precious Nana's buttons from her button tin, but they definitely set the card off.

Stamps: Waltzingmouse Teeny trees, Papertrey Ink Leaf prints
Ink: Tim Holtz Distress inks- Tea Dye, Antique linen, Spiced marmalade, Barn Door, Walnut stain
Twine: Fantastic Ribbons Gold and Ivory Bakers twine
Card base: Kraft 6" square

Please let me know what you feel about my alternative style wedding card!

Tuesday, 19 November 2013

CAS summer Thank You card


A simple yet classy card to say thank you. A little bit of embossing goes a long way, especially on white card, and swiss dots is one of my favourite embossing folders.
As you may realise, green is my go to colour, and this great polka dot washi tape from Fantastic Ribbons really works well.

Stamps: Waltzingmouse Country Labels 4
Ink: Memento Black, Bundled Sage Distress ink
Dies: Spellbinders Labels 4
Embossing folder: Swiss dots
Washi tape: Fantastic Ribbons Green Polka
Card base: Cream A5

This is being entered into the Lawnscaping Challenge #70 - Polka dots

Saturday, 5 October 2013

Give Thanks to the Lord Cherries Card


This was a card I sent to Lebanon with a care package of the new Cadburys marvelous creations chocolate for a good friend of mine who is out there helping engineer some projects.

We met when we were both 18 and taking a gap year before university and doing a Year in Industry at different engineering companies, but right next door to each other. Why did we hit it off? Because we both had WWJD bracelets on and had an instant connection.

I was excited to break out my Country Labels 4 stamps again, and especially these super cute cherries.
I stamped the background cherries using Memento Lady Bug ink and pearlised green ink. I used the same green to stamp the labels 4 shape and also on a scrap of card I stamped an extra cherry to fussy cut to embellish. I cut the labels 4 with my Nestabilities die, and a larger one to layer onto which I embossed with Cuttlebug swiss dots. Some lovely dotty ribbon and  layered onto black card and it was finished!

Wednesday, 4 September 2013

Peter Rabbit First Day of School


This week was my son and nieces first day of Primary school. The card I made for the Waltzingmouse Pajama party here I gave to my son. For my niece I cracked open a new stamp set from Crafters Companion and printed this Peter Rabbit, and coloured with Promarkers. I used my Country Labels 4 stamp for the mat, and also the tiny apple stamp from Teeny trees for my background (I thought it tied in well with the school theme). I cute the mats with Spellbinders Labels 4 and embossed with some circles. Some tiny buttons to embellish it finish it off.

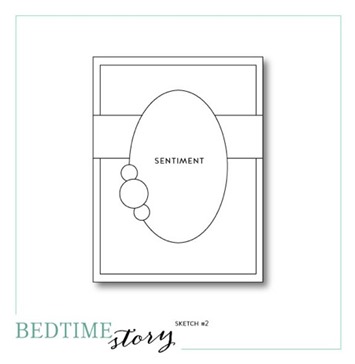
This card is being entered into the Waltzingmouse Bedtime Story Sketch
PAJAMA-PARTY-sketch-2

I hope you like, and please go look at the other entries into the sketch challenge.

Friday, 30 August 2013

Waltzingmouse Pajama Party

PAJAMA-PARTY-LOGO


I'm excited to be taking part in this months pajama party, especially because I wasn't sure I'd be able to play along, partly due to time constraints, but also because at first glance I couldn't come up with anything for the 4 categories. In actual fact I started to come up with an idea, and it led me to try and incorporate all 4 challenge themes in one card!

The themes are:
1. Tie a knot in it
2. Get Nauty(cal)
3.  Colour inspiration
4. Golden Oldie stamp sets.

So here's my card

So here's how I did it.
I stamped the cloud shape in versamark, from my oldest WMS set,(the awesone Teeny trees!) I think its a tree outline, but it makes a great cloud!  I heat embossed with white embossing powder to act as a resist to the blue ink I sponged for the sky. 

I used my Silhouette to cut the pirate ship(I bought the file from the silhouette store), and then stamped some detail onto the ship using an Offbeat Background stamp to look like planks. I also sponged the sails and added the pirate detail to the flag. 
I cut some blue paper with Spellbinders edgeabilities scalloped borders and then stamped onto it with another Teeny trees stamp to give a wave effect.

I added some extra details with a burgundy crows nest, some Card Candy gold port holes and a hand made anchor.


Here's how I met the challenge themes:
1. Tie a knot in it - My anchor is hand made from silver wire and twisted and knotted. It took me a couple of attempts to get it to look like this!
2. Get Nauty(cal) - The pirate theme!
3.  Colour inspiration
4. Golden Oldie stamp sets. - My oldest WMS stamp set is Teeny Trees.

I hope you have enjoyed seeing what I created, I love to hear your feedback. If you'd like to see what everyone else made pop over to the Waltzingmouse blog.

Thursday, 1 August 2013

Happy Everything Goes!


Here is a card I made for my sister in law whose birthday is tomorrow. After being inspired by the recent Pajama party to use my Folk art medallion set with some vivid colours I set about finding the perfect combination of colours. After some experimentation I decided to go for Distress Inks in Seedless Preserve, Forest Moss and Chipped Sapphire.


I took the tiny pennant from the set and stamped along the central section with alternating colours.
I also embossed some purple card with Swiss dots and stamped an extra medallion and some leaves for embellshmenst. Finally the sentiment is Paper Smooches from the set Simply Said.


I'm entering this into the Waltzingmouse Pajama Party Bedtime story sketch


and the Paper Smooches Anything goes challenge


Monday, 29 July 2013

Pajama Party! - Kraft art folk Happy Days card

Welcome to the First Waltzingmouse Pyjama Party! 
It's a late night (UK!) blog party which replaces the Blog party/Blog waltz. I'll be honest, I'll miss the old format on the 17th, but I do welcome the broader range of the new challenge, as some months I was really struggling to find a way to play along, sometimes meaning I just wasn't able to, but the new format means that will be much less likely.
Personally I'm not a night owl, so will probably be one of the last to link up my cards, but hey ho!

I chose to do the In The Background challenge, and stamp one of the small Fold Art Medallion images.


Here is the card I made for a friend who is starting a new phase in her career and I wanted to let her know that bright days are ahead. I think Folk Art Medallions is one of my new favourite stamp sets from Waltzingmouse, and it's SO versatile. I stamped up the background super quick using Walnut Stain distress ink and it was straight forward using a grid acrylic block. I actually stamped straight onto the kraft card base. I then stamped the Folk Art Labels 25 onto some cream cardstock using more walnut stain and the sponged all the edges. The sentiment is from an old set of Banana Frog stamps, but they are now discontinued. A lovely chocolate brown ribbon edged in gold finished off this card.
I hope you like it, do check out the other cards over on the Waltzingmouse blog.

Wednesday, 26 June 2013

Elijah Rainbow Banner

In preparation for the Cake Smash photos I wanted to make some props, and really liked the idea of a name banner. As I had planned a rainbow cake, a rainbow banner was obviously appropriate.
I used my Silhouette to cut the banner shapes, which made it super easy, and I cut each of the letters of his name out too. I then stamped onto each white banner with the coordinating colours, and used square, circle and star stamps.
Here's a close up...

And here's how the finished banner looks :)


Sunday, 16 June 2013

Gorjus Girlie card

This is a card I made for my friends daughter who was turning 3. I used a Gorjus Girl stamp and coloured her with promarkers. I've learned my lesson in the past and having coloured a beautiful image not been able to find any paper to match it, so based on some advice from C&C I chose my background paper first and based my promarkers on that! It makes SO much sense! I made use of some little punches which often get neglected, a tiny label one onto which I stamped her name, and a candle one which I think looks cute in the centre of a die cut circle. Doing pinks and purples is outside of my comfort zone, but I'm happy with how it turned out!

Sunday, 2 June 2013

Vintage Wedding Card WMS


I think I have a new favourite stamp set. I have fallen in love with the new Waltzingmouse Folk Medallion set. It is so versatile, and I am excited to see all the different ways I will be able to use it. After the blog waltz I had pinned lots of different images onto my pinterest board, and I totally CASEd this card from Karin here. 

I stamped the main image in versamark and heat embossed with WOW fine white embossing powder, I then chose some of the smaller medallions (of which there are many, and so many combinations you can use!) and stamped them in a variety of browns. I was stamping onto the card which you find in the centre of wrapping paper! I then sponged this and layered up onto some white, brown and then kraft card base.

Thursday, 30 May 2013

OLW142

I was so excited to see that this weeks OLW was to make a card in the style of the lovely Ardyth. Why would I be so pleased? Because her cards are CAS (and I didn't have a lot of time to make this), geometrically pleasing, and mostly RAINBOW!!!!


I wanted to make a card for a friends baby shower, and knew a simple pastel rainbow of little duckies would do the trick. Since most of my baby sentiments are for when the baby has arrived I wasn't sure what to use, so went with "It's a girl" and " It's a boy" and just added some question marks in pen!!!

The colours of promarkers I used where Pale Pink, Soft Peach, Vanilla, Meadow Green, Cool Aqua and Blue Pearl.

I hope you like it!

Thursday, 16 May 2013

Fantastic Ribbon Spring Flower Card Including tutorial

This month the Fantastic Ribbons design team are making ribbon flowers for your inspiration!

So here is my card, showcasing some beautiful polka dot satin 10mm ribbon and some green polka dot washi tape.
After I made this card a few months ago people were keen to see a tutorial on how to make the ribbon flower, so here's what you'll need:
A circle cut from card and covered in double sided tape and some ribbon.
Now for the finer details!
I used a 1.5inch circle punch, 1m of 10mm ribbon (there was enough left over for my card, but its good to have a bit extra). The double sided tape should be as strong as possible, I recommend the red backed tape. The ribbon can be pretty much anything, but organza doesn't work very well.


So you start by attaching the ribbon 1/2 on, 1/2 off the circle and lay down about 1cm, then fold back a small overlap. Continue around the outside adding 1cm folds until you completely cover it, and then when you get back to the start you can move in a layer. Continue doing this until it is completely covered.


I did a pink one too.

You could use a button as a centre (Left), or a large brad (Right)


I stamped some leaves (Waltzingmouse Folk Medallions), a stalk and sentiment (Stampendous Ribbon builder) and added some washi tape and ribbon to a 5" white card which I'd sponged with green ink round the edge and added it to a 5 1/2 " card base.

I hope you like my spring flower, and do have a go at making your own ribbon flowers, they make a great embellishment, and are really easy to make.

Please check out all the beautiful ribbons over at Fantastic Ribbons for your inspiration!


Sunday, 12 May 2013

Art Deco Eiffel Tower Card

Here is the card I made for my mother in law. It is perfect for her, because she loves the art deco style ladies and we're going to Paris together in a month! I used some of my lovely Waltzingmouse Paris Nouveau stamps: the lovely art deco border stamped in Peacock Feather Distress ink, the Eiffel tower stamped in Archival Black, and the Paris word. The art deco lady and the Best Wishes sentiment are from a free set by Claire Coxon that came with a Docrafts magazine this winter. I stamped the art deco lady onto some Stix2 masking paper and cut her out so I could stamp the Eiffel tower behind her.

I stamped some more Peacock feather distress ink onto my craft mat and then painted with it like a water colour. I also mixed some Antique linen with some Barn door distress ink to make her skin tone. Peacock feathers tie in with her hair piece and dress really well. I sponged around the outside with more distress ink.
Finally I added some Fantastic Ribbons Aqua Organza. A little white tag and some nice pins, and a little turquoise gem on her headpiece finished it off.