Wednesday 30 May 2012

Beehive Cupcakes

So this week is my final week at work before I start my maternity leave, and so I wanted to bake some cupcakes for my colleagues. 

My friend found this image on Pinterest and sent it to me which was my inspiration.
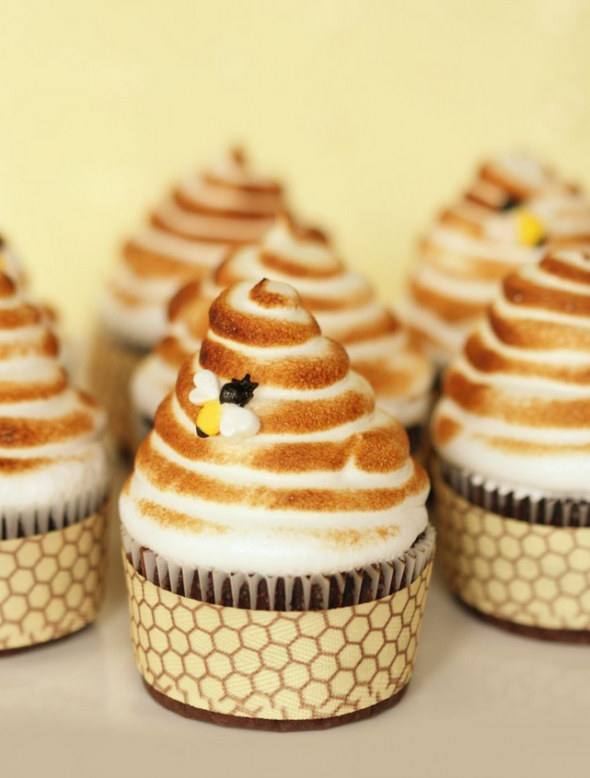
This is over at Sweetopia, and its meringue icing on a chocolate cupcake. I did want to do the meringue icing, but my little blowtorch is pretty pathetic, and I didn't think it would be able to cope doing this. 
I think you could cope with that amount of meringue icing, but not buttercream, so I adapted the look and taste of this to suite me!


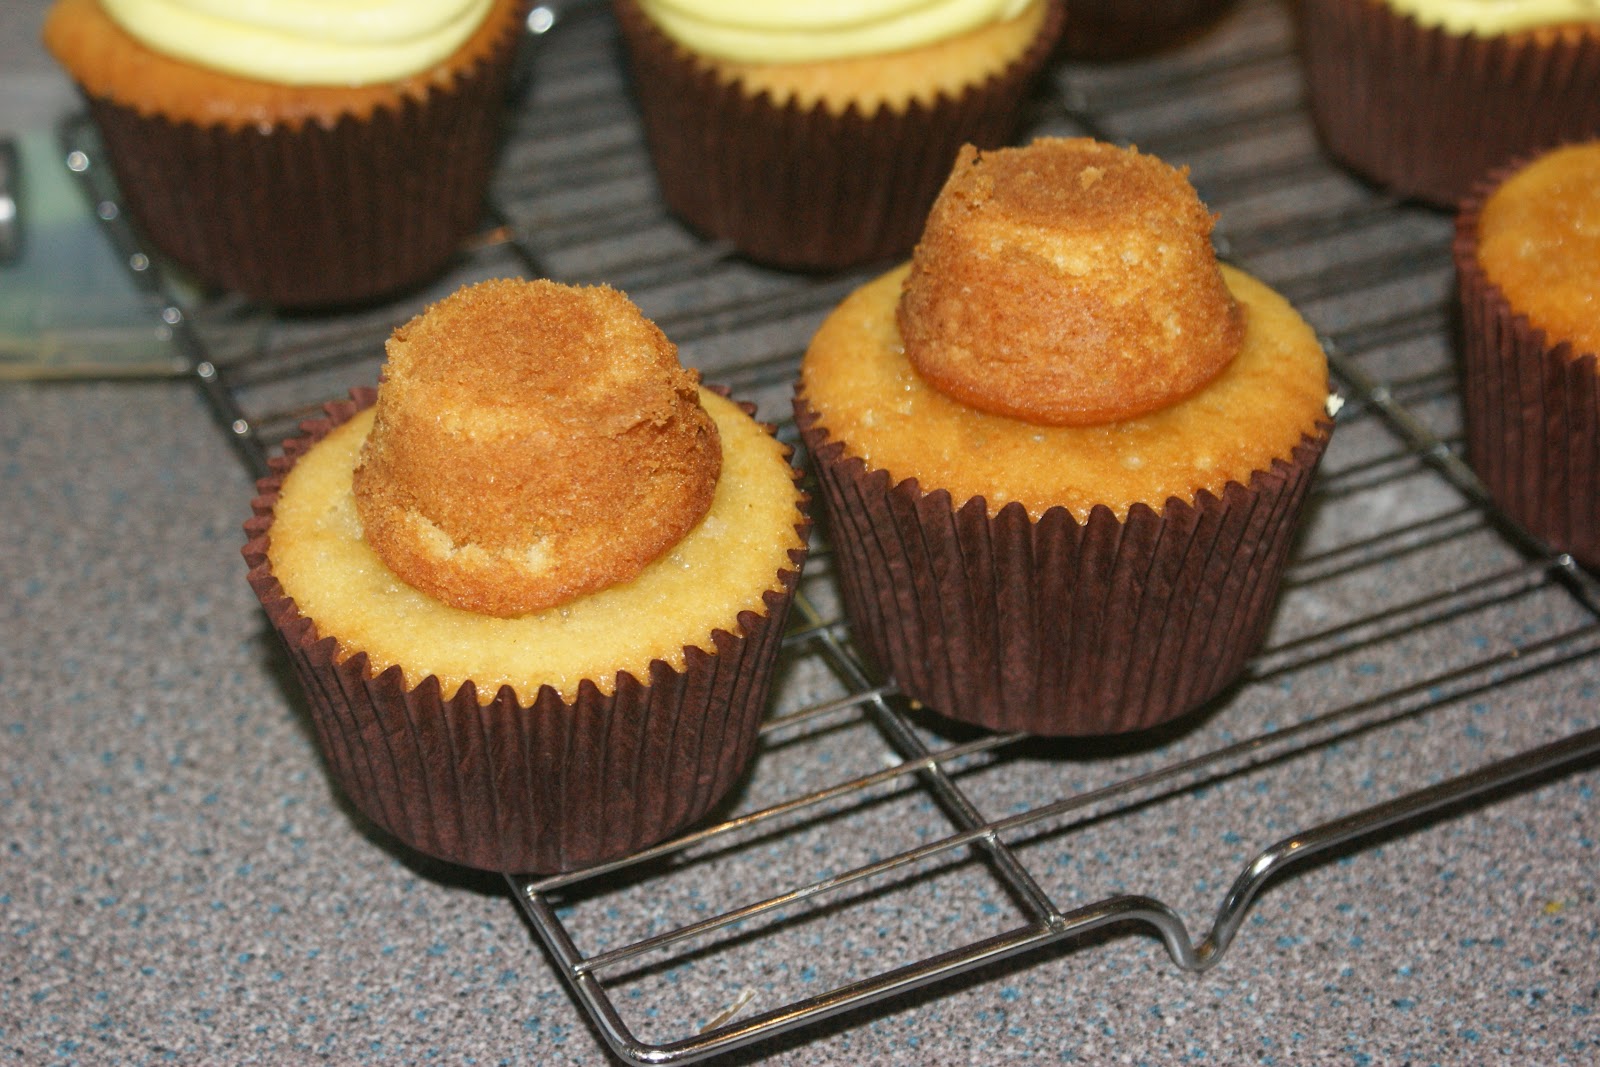
I started by making standard size lemon drizzle cupcakes, and some tiny miniature cupcakes to bulk out the beehive and reduce the buttercream!

I then made some lemon buttercream, gently coloured. It was actually quite tricky to pipe around the mini cupcake, I kept getting gaps between the layers.

I placed a yellow sugarpaste bee on top which I'd striped with dark chocolate drizzles and almond wings.

Here's what it should look like!

And here's a bunch of them, they're not very consistent!


I'd also tried to make some decorations out of the left over dark chocolate. I'm not great at piping lettering so it was quite tricky, but the results are quite cute!


I did sneak one of the more shabby looking cakes to try, and it was delicious, but SO hard to eat, think plates and spoons/forks will be a must!!

Thursday 24 May 2012

Waltzingmouse Blog Party - Felt or Cosy Fabrics

Blog-Party-Logo 70%25

This months challenge over at Waltzingmouse was to use felt or cosy fabrics, and although this was quite a challenge for me I have definitely been converted to felt! I knew that I wouldn't want to go with flowers or the other usual ways to use fabric, so started out by considering a whole felt background (which I even made and will be made into a future card) but then decided on a rainbow themed card (you know how I love a rainbow!!)
I love rainbows because they signify Gods love for us and his promises for us even when things seem to be a disaster, and often the time after we have troubles is the most blessed.
So I used my nestie circles to cut out varying sizes of rainbow coloured felt I had and pieced together. When I have made a card rainbow in the past I've just layered up the card, but with the felt this isn't so practical, as it ends up about an inch thick, so I had to cut out thin bands of the felt instead, using two nesties at once.
I glued them to a circular piece of card, and once dry cut in half. Below is the original, and the one I distressed for the card - the yellow and orange were just too vivid for my liking!


I used the Teeny trees set to stamp a sun and come clouds onto some white card and cut out, and once I'd sponged the background with Broken China and Forest Moss distress inks I used the smallest tree trunk stamp to stamp the trees.

The sentiment is stamped using a stationers stamp set where you have to take each letter and lodge in a plastic holder until you make your phrase. It takes a while, but I like the look it gives, and also means you can customise any sentiment you like.


I hope you like this card, and head over to waltzingmouse to see the other people taking part in this months waltz.

There's also still time to enter my blog candy draw for reaching 25 followers (26 now!)

Tuesday 22 May 2012

OLW88 - Mini Masterpiece

So this weeks One Layer Wednesday challenge was to create a mini masterpiece, limited to a 2 inch square, but with a sentiment allowed outside this limit. I'll be honest, I was inspired by Susan over at Simplicity to give this a go, and I'm so pleased I did, because I really enjoyed playing around a little with this challenge. Here I'm sharing 2 cards which use the same stamps, but highlight how small changes can completely change the look of the card.
Up first is the portrait version in mainly blue. I die cut the stamp shape in a piece of card using my cuttlebug stamp die. I then used it as a mask to sponge and stamp inside. I used Cracked Sapphire, Broken china and Tea Dye distress inks to sponge my background. I then used a music note stamp in broken china at a diagonal. I have a beautiful Papertrey stamp set called Postmarks, and it has these tiny little images that mostly I never use, but thought they would be perfect for such a small area. I also used a sentiment from this set.

Here is a close up of the 2 inch image. 
Here's the landscape version of the same card, with the sentiment going into the little frame.

I tried stamping the music notes in versamark this time, but it didn't show up very well at all. Inks this time were Tea Dye and Walnut stain.

I hope you're inspired by this mini masterpiece, I will definitely be using this technique again very soon. I might venture a little bit bigger than 2 inches, and choose a Spellbinders label for the shape!


LIM 68 - Childrens card


Here is a quick card for the Less is More challenge. Although it didn't need to be a one layer card I was on a roll with one layer ones, so chose to do this little robot like that. He's from a Stampendous set where you take all his individual body parts and make a robot, which leads to hundreds of combinations. I'll be honest though, I tend to stick with this combo! I coloured him with my promarkers.
 The balloon and sentiment are from a cheap set I got from the Range, the stamps are really poor quality and squidge with the slightest pressure, but hey ho!

Tuesday 15 May 2012

I finally did it...

I was chosen as the top 3 in a challenge I took part in!!! In the last 18 months of blogging and doing challenges I have never before been chosen as having a top card, and on one particular challenge I was getting so disheartened at never being chosen (not that I think I'm like the best card maker ever, but I always make such an effort and think outside the box for their challenges) but hey ho, I don't craft for recognition, so I suppose its just nice for someone to say they like my card. I wouldn't mind, but the card that got me top 3 was a very CAS card, and took very little time to craft. Maybe thats where I'm going wrong, I must try too hard!
Anyway, that, along with recently hitting 25 followers has prompted me to get some candy going!

So if you would like to win some cuttlebug squares dies (very useful for making mini quilt patterns on cards!), brand new in the pack, then just leave a comment below. I'm willing to post anywhere for my lovely followers.
Oh and if you're interested I won the Passion for Papertrey Challenge here, and can't wait to proudly display my blinkie soon!

Wednesday 9 May 2012

Sunflower birthday card - LIM/CAS-fridays

This card combines the challenges over at 'Less is More' (Yellow)and also Cas-ual Fridays (Birthday cards).
I've had this Papermania sunflower set for a couple of years now and rarely use it, but its a lovely big stamp that can either be a background stamp or a main image, and it definitely fits the Yellow theme! I coloured it with promarkers.

The sentiment is from Banana frog, and as I wanted to add something extra to this, I used the stamp with some versamark ink and then used mica powder for the background. Its very subtle, and very hard to photograph!!! I have also outlined the main image with a fine line marker.
Can you see the subtle mica?!!
The polka dot ribbon ties together the card.
Hope you like it!

Sunshine and Cloud Passion for Papertrey challenge.

Over at A Passion for Papertrey this fortnights challenge is to create a 'Whatever the weather' project. I only have a few PTI sets, and none of them jumped out at me as weather stamps...but then I was inspired by the fillable frames 5 which I have, and looked quite cloud-like, and also had the sentiment 'hello sunshine'!
This is a very simple card, I stamped a circle image and cut out with my circle nesties, I also stamped some chevrons from the PTI Postmarks set to be the suns rays and cut them out. I stamped fillable frames 5 in some sky blue ink and then used the die to cut it out. Finally I stamped the sentiment and used a fine line pen to outline the card. Hopefully this card will cheer someones day!


Monday 7 May 2012

Welcome Emily

So last week my little Niece Emily was born, she is my 2nd niece and she is just gorgeous!
Here's the card I made for her.
Stamps: Plaid background stamp on the labels 1 shape is Waltzingmouse Offbeat backgrounds
The butterfly is stamped with polka dots from Waltzingmouse Offbeat backgrounds too. 
The Welcome baby and date stamps are from Papertrey Ink Postmarks set.
Ink: Main images are inked with Memento Dew Drop Angel Pink
Small date circle was too pale in angel pink so I used Colourbox Lilac ink.
Die cuts/Punches: Butterfly is Tonic Studios
Stacked nesties are Spellbinders Label 1 and label 4 - label 4 is embossed with polka dots.
Under the ribbon is a strip from some Bazzill basics die cut strips. 
Little circle is the spellbinders nestie smallest circle size.
The chipboard letters I've had for ages.
Cardstock: Background striped paper is from papermania, don't know which pack, sorry!
Ribbon: VV Rouloux


I also stitched her a personalised blanket. The rabbit is just cut from white fleece material and I embroidered the main features. I then cut out the letters from white fleece (using some chipboard letters as a template!) and then when I'd stitched them on in white I added some outline stitching to make it stand out a little. The blanket itself was from Sainsbury's (a supermarket) and has cute little hearts almost embossed on it.

Tuesday 1 May 2012

May Day Panda Cupcakes

Happy May Day! Ok, so I know that May Day has pagan origins, but for me its just a day which highlights that spring is in full swing (it was glorious weather here yesterday for a change!) and in the UK signals a bank holiday! Although we have to wait for next monday for the bank holiday its also very exciting to be in the month of May as that means my baby is due next month!

Another reason I have a fondness for May day is that as a child our primary school used to do Maypole dancing, and I think we were the only school in town who had their own maypole. For weeks before we'd have to practise the different dances to make sure we knew them properly. When you dance with the coloured ribbons they wrap around the pole in a very complex and lovely pattern, each dance giving a slightly different pattern, and by the end of the dance you unwrap them. You can imagine what confusion and knots would ensue if people did it wrong!! I'm inspired to try and make a card with this as the theme!

Next I want to share with you some beautiful and fun little cupcakes me and my monkey made this weekend.  A good friend of mine put me onto a fantastic blog called Bakerella
and the most recent post was some CUTE panda cupcakes
Panda-cupcakes_3655

I knew straight away that I wanted to have a go at these, and as I was making some chocolate cupcakes for my Year 11 class anyway, I made a few extra little fairy cake sized ones to decorate. I underestimated how small the cupcakes were over on Bakerella to get the chocolate chips to be the main decorations, and I ended up using chocolate buttons instead to make ours. My monkey thought they were amazing, and they tasted pretty darn good too. I used my 'best chocolate cupcake recipe' and the hummingbird buttercream recipe. I think I need to set up a link to a post containing all my best tested recipes for easy access, but that can be a job for another day.

So how did they turn out?!
Monkey needed a little help with the icing and where the eyes should go, but he thought they were just the best thing ever!

Here's us just before he demolished this one!!
I recently bought a great book which helps you transform cupcakes into fun objects and animals, so keep an eye out for more fun baking posts!
Have a great day!