Wednesday 30 March 2011

Best Chocolate Cupcake recipe?

So today I am testing a recipe I found online making the claim of being "the best chocolate cupcake recipe". For our school bazaar on saturday I'm doing ALOT of baking, so imagine my suprise when Honey came home tonight and sheepishly said "theres a cake sale at work tomorrow for mencap" and I replied "I'm already baking about 6 cakes, and 48 cupcakes for the bazaar!", however I decided that I did need to test out this new recipe I had found online, so have made some anyway!
Here's a few piccies (I apologise for my bad photography skills, I wish I could take better pictures!)

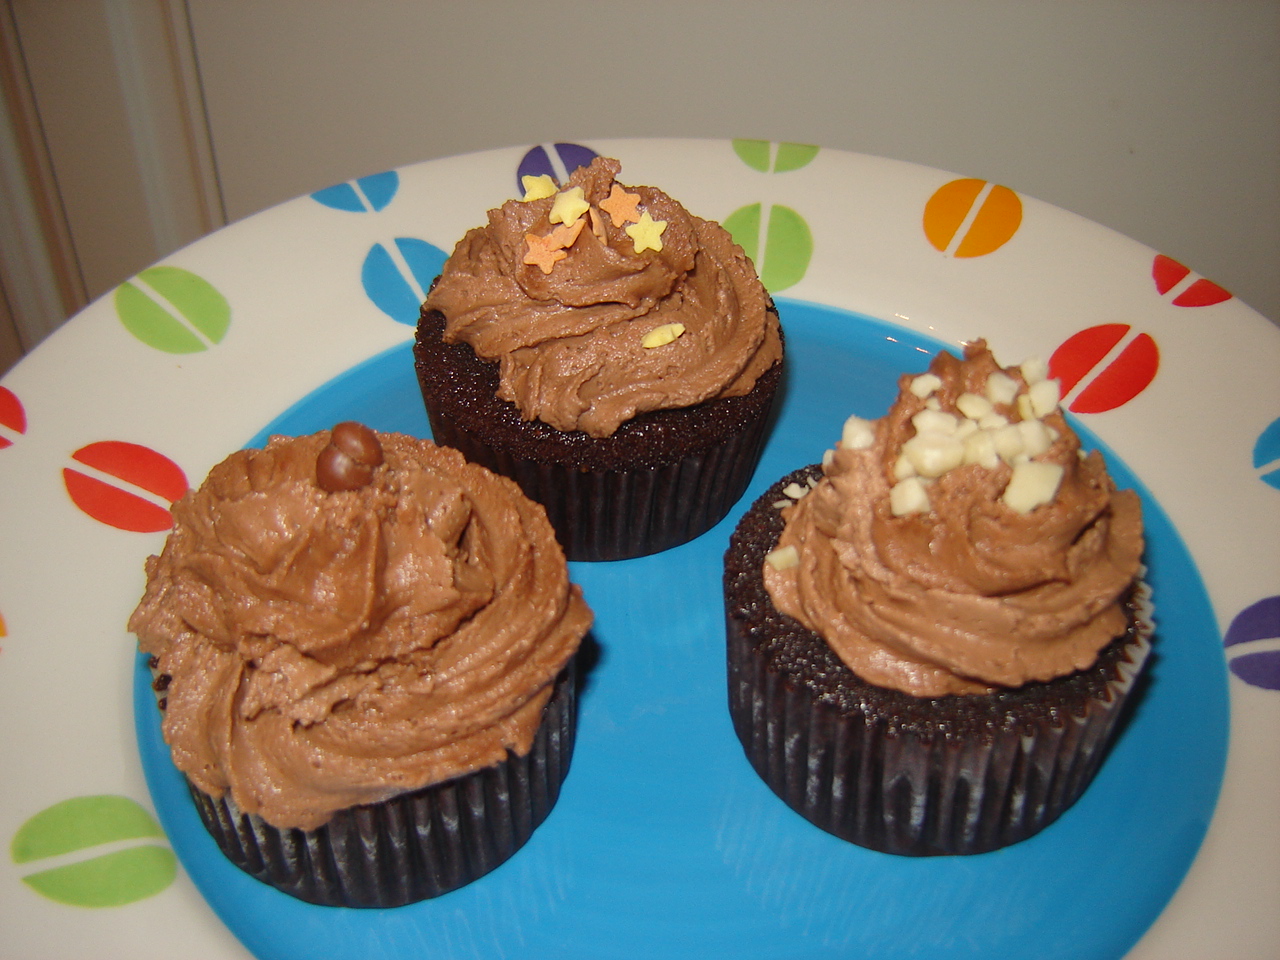
My piping skills need a little practice, but I'll be making these again on friday!

So for anyone who is interested, heres the (slightly quirky!) recipe for 20-30 cupcakes (depending on your tins!):
I apologise in advance, this is in cups, as its an american recipe, and I don't know the metric equivalents!
You just need to buy a set of cup measures, they're only a few pounds!

2 cups sugar
1 1/4 plain flour
3/4 cup  cocoa powder
1 1/2 tsp baking powder
1 1/2 tsp baking soda
1 tsp salt
2 eggs
1 cup milk
1/2 cup vegetable oil
2 tsp vanilla extract
1 cup boiling water
Heat oven to 180 degrees (350 farenheit). Combine the dry ingredients in a large bowl. Add eggs, milk, oil and vanilla; beat with electric whisk on medium speed for 2 minutes. Stir in boiling water. The batter will be thin, don’t worry about it. Pour into muffin tins, about  60% full. Bake at 180 degrees for about 22-25 minutes. Cool and then add your chosen icing. (Don't overfill the cases as they will rise, and just spill over!)

I decided to create my own buttercream icing, a bit of an experiment, but it tastes good! This is metric, as I made it up myself!
125g butter (room temp)
250g Chocolate spread (like nutella, but I just used Asda's)
175g icing sugar
First beat the butter and chocolate spread, then gradually add the icing sugar (too much too quick and you'll disappear in a white cloud!).Eh voila!

Here's the original post I found, with a much better picture.

Monday 21 March 2011

Card Patterns Sketch 107


So here's my take on this weeks sketch. I needed a 50th Birthday card for a friend, and decided to use this sketch and make it a little more masculine by using black and white and instead of scalloped edges a zigzag - done on my ultimate pro embossing board. The stamp shape is a die I got with my cuttlebug, and the numbers are Banana frog, and done with black embossing powder. Some faux stitching, ribbon and a few brads finished it off! Hope you like!

Friday 18 March 2011

Comic Relief Cakes!


Well as today is Comic Relief day (or red nose day!) I have baked!- for those outside the UK Comic Relief is a charity day to raise money for a whole range of worldwide causes but the main focus of fundraising is comedy, or doing something funny. As a teacher we are always at the centre of fundraising efforts, and mine tend to be based on baking. We have another event in a few weeks, our main school fundraiser, so my baking for today was quite limited. I decided to make simple cupcakes with their own red noses (cherries!) but couldn't decide on what icing to do, so did two.
I am trialing a meringue icing, which although I've never made in this way before is the one I like best.
I also made a classic buttercream icing, which my husband liked best.
In the picture the meringue icing is white and the buttercream pink (I just needed a way of identifying them!).
I just blobbed a bit on top and used a fork to give the lines (I didn't want to dirty my piping bag for just a few!!!) The merigue is a lovely shiney, glossy finish and spread really well. The buttercream wasn't quite so easy to spread and would need piping properly!

I'm going to gauge peoples reponse to the different icings to decide on which to use for the next fundraiser. Personally, not only do I like the taste of the meringue, but its much better for you (icing is about 200cals per cupcake, meringue is approx 50cals!) , and as it uses mainly only sugar and egg whites its a more cost efficient icing!

Meringue Icing Recipe - approx 18 cupcakes
2 egg whites
150g sugar
60ml golden syrup
pinch of salt

Mix egg whites, sugar, syrup and salt in a large bowl until combined. Put the bowl over simmering pan of water and whisk until the sugar dissolves and mixture is hot (this ipasturises the eggs). This takes about 3 minutes. You then take the bowl off the heat and using an electric whisk beat for about 7 minutes until you have stiff peaks and a cool mixture. If you want to add flavourings add them now (vanilla, etc). The icing is ready for using.

Buttercream Icing - appox 12 cupcakes
125g butter - room temp
250g icing sugar
a few tsp milk

Beat the butter and add the icing sugar gradually and beat until combined. Add milk 1 tsp at a time until the consistency you want.

Have a try at meringue icing, I know its a bit more involved to make, but its definately worth a try!

Thursday 17 March 2011

Waltzingmouse Blog Waltz - St Patricks Day

Welcome to the Waltzingmouse Blog Waltz!
Well here is my take on St Patricks day! I must admit when I first saw the theme I was like "oh no!". The only things I could think of were green leprechauns, shamrocks, rainbows and pots of gold. (very stereotyped but hey!) I had no inspiration whatsoever, but I asked for help over on the waltzingmouse forum, and someone suggested celtic. Well that was all I needed! I've loved celtic knotwork for many years, and was bought a celtic design book for my 15th birthday (almost 15 years since!). It gives instructions on how to create your own hand drawn celtic knots. So I dug it out and found a few designs to do. Heres a link to the book if you're interested Celtic Knotwork designs

The book gives really detailed instructions, so its pretty easy, but very satisfying!
The first thing I did was do a grid on some watercolour paper, and it was made much easier using my rolling ruler, as it has little holes you can use to do the dots!

The next thing to do was copy the pattern and add the drawing in pencil.

Sorry if thats very faint, but its in B pencil! I then went around the outline with a fineline marker and erased the pencil marks.
Heres a picture with the 4 designs I'd chosen to try.

I'll be using the others in weeks to come, so keep an eye out for more celtic stuff!
I decided to paint the inside of the design with distress inks, as I wanted a more subtle green, and its easy to use with water.
I started by using very strong colour around the edge, then watered it down and added a middle layer, and finally I used just water to blend the whole design.


Now the design was the easy bit, I then had to decide how to make the card, so I cut the design using my nestabilities circles, and layered it onto some suede paper in a sagey colour that matched really well.
I used a plastic circle mask and put the white 5" square cardstock through my cuttlebug with my No More Shims embossing mat. This gave a great pattern which complimented the design. I wanted to incorporate some gold into the card (well gold and green are very Irish!) so I used my gold ink pad and brushed it over the embossing. I also used a sponge to add the gold ink to the edge of the card and around the design.

I finally used the walzingmouse free irish designs from last year, and printed off on my computer the "Emerald blessings" sentiment and then cut it down to say just "blessings". (I don't have any irish friends, or anyone to make a St Pats card for really!). I layered it on the sage suede again and stuck it onto the cardstock using some 3D foam pads!
I hope you like my take on Irish!

Wednesday 16 March 2011

Waltzingmouse Sketch Challenge 38

Heres my cards for the sketch challenge over at Waltzingmouse. Below is the sketch that my cards are based on.
#38 Sketch
This is a good sketch for making more than one card, as once I'd cut out the background papers with my cuttlebug and circle nesties I had 2 half circles to use. The flowers are just made using a small circle punch and then layered up with a little gem in the centre.
 I used a Banana frog sentiment, used clear ink and embossed with black embossing powder, then layered up on black card.
I decided to do one background as a kind of patchwork, and the other as a reverse of the patterns on the main circle.
Hope you like my interpretation!

Saturday 12 March 2011

New Baby Cards

Today I'm posting all about baby cards! We go through phases of having friends who have babies, and I have made lots of cards in the  past and not taken photos, but at the bottom I've included any that I did have.
So the card I made last week was for some friends whose first baby was born the exact same day as Monkey!

In the past I've stuck with the same type of card, but this time I wanted to do something simple, and use my new embossing folder with my cuttlebug!

I used some baby blue card, embossed in the folder through my cuttlebug. I then used Cracked Sapphire distress ink to highlight the words. I used some cuttlebug star dies, making the larger size in navy blue, and the smaller one in baby blue. I also punched out two little feet from navy paper.

I used my embossing pen, and then some clear embossing powder to write the name and date onto some baby blue card, then layered onto navy card and added some brads in the corner. My handwriting isn't great, so I got a calligraphy book for Christmas, and although I still need practise its better than my own handwriting!
I used ribbon adhesive to add two thin lines of navy ribbon to the card once I'd gone around the edge with my wavy edge trimmer.
You can see here that the smaller star has been triple embossed. I covered the whole star in clear ink then applied clear embossing powder and heated it. I did this twice more and it gives it a really nice glossy effect. I used some tiny foam squares to attach the feet and give it some dimension.
And here are some other new baby cards, all of which feature stars, which I think are super cute on baby cards!

Wednesday 2 March 2011

Vintage 60th Birthday Card

Today I bring you a card which took me AGES!!! Now you may look at it and question why it took so long, but I kept changing my mind!


There's quite a lot of pictures to show how this came together. I started off by stamping some sage green paper with an ivy leaf (My Minds Eye -Wild asparagus) in bright green. I like the tone on tone look with that. I then used spellbinders labels 1 die to cut the main paper and wanted to make a raised front to the card, so needed to cut a matching piece of cream card with the next size labels 1 die. To make sure they matched up perfectly I layered them up and drew through with the smaller die to help my positioning. The pictures probably show it better.

 I inked very gently around the inside of the labels shape with gold ink, and around the outside of the sage paper. You can see this better on the later images.
I then printed off the numbers 60 onto some white card so I could cut them out. I used my cuttlebug to emboss the numbers (I used provocraft Divine swirls), and then used distress inks to give them a vintage look. I used a scalpel to cut the inside of the numbers, and it wasn't too neat, but once embossed it wasn't noticable.
The paper you can see in the right picture is actually a skelton leaf piece of paper, and is very delicate, but matches the colours of forest moss and tea dye really well.
I had originally wanted the card to be landscape, as I based it on a card I saw over at Waltzingmouse, so I tried that first.
Somehow, it just didn't look the way I wanted, and I couldn't figure out how to finish it off, so eventually I decided to rotate it and make it portrait instead, and then had to figure out what I wanted across the bottom. I tried ribbon, vellum, but finally decided on card with a printed sentiment. This next photo shows more faffing I did trying to get it right.
The top shows vellum stamped with gold and black ink sentiments, and I used some promarkers to test the colours. I decided I didn't like it! I then embossed two lines on some cream card, stamped the sentiment and was sponging...but got a little carried away! So I had to start again on a new piece of cream card, emboss and stamp! The sentiment is Banana Frog, and the little Maple leaves are Waltzingmouse Teeny trees. I stamped in Forest moss distress ink. I did a little sponging this time with gold ink.

Finally I pieced it all together, layering up with foam pads - ideally I would have used thicker foam to make the aperture stand out more, but alas I had none!
I took this picture without the flash so you could see the natural shadows.
So there it is, 4 hours worth of crafting!