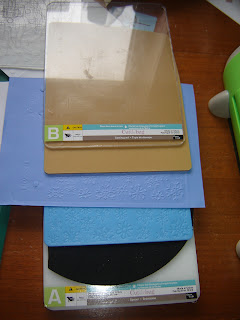
So today my No More Shims Maxi embossing mat arrived! I was so looking forward to it, as its a belated Christmas present, and I've been making do with my improvised embossing mat since mid december.
My improvised embossing mat was a computer mouse mat which I had cut so it fit through the cuttlebug. It did a reasonable job of embossing the edges of my spellbinders dies, but not anything else.
I'd bought a few stencils - brass and plastic - which I was hoping to be able to emboss, and so to have the No More Shims was really exciting!So the first thing I tried to emboss with was a plastic stencil. This worked with the sandwich they suggested (A-B-Stencil-paper-matt-B) and did a good emboss with paper.
I then moved on to some textured plates by Fiskars I've had about 5 years. They have this little texture tool you emboss with, but it takes ages and made my hands hurt, so I rarely use them, which is a shame, because there are 12 cool patterns.
So I attempted to use this in the same sandwich, but the texture plate made it just too thick. I removed one B plate and replace the final B with a C, but unfortunately it was now not thick enough. I was gutted that I wouldn't be able to use these, so I went back to my improvised embossing matt and created this new sandwich.
(A-mouse matt-texture plate-paper-embossing matt-B)
This worked!Yey!
This picture isn't too clear, but the left section is a piece of paper I tried to emboss with the texture plate and just the mouse matt - it didn't work!. The right is the actual texture plate, and in the middle is the embossed paper when using the no more shims!
Lastly I tried some metal stencils I'd bought. Because the're very thin metal this worked well with paper, but not great with card, but thats understandable. With the bee stencil I also tried inking up the stencil and then embossing which looks quite good.
So all in all I'm really pleased with my new embossing matt, I haven't tried any other brand so I can't compare, but it worked really well compared with my improvised one!!!! Can't wait to try with my spellbinders!


No comments:
Post a Comment